Aluminium Welding

Aluminium Welding

Aluminium is a lightweight, soft, low strength metal which can easily be cast, forged, machined, formed and welded.

Unless alloyed with specific elements, it is suitable only in low temperature applications.

Aluminium is light gray to silver in color, very bright when polished, and dull when oxidized.

A fracture in Aluminium sections shows a smooth, bright structure.

Aluminium gives off no sparks in a spark test, and does not show red prior to melting.

A heavy film of white oxide forms instantly on the molten surface.

Its combination of light weight and high strength make Aluminium the second most popular metal that is welded.

how to weld aluminium

aluminium welding guide

Aluminium Welding

Aluminium and Aluminium alloys can be satisfactorily welded by metal-arc, carbon-arc, and other arc welding processes.

The principal advantage of using arc welding processes is that a highly concentrated heating zone is obtained with the arc.

For this reason, excessive expansion and distortion of the metal are prevented.


Aluminium Welding

b. Alloys. Many alloys of Aluminium have been developed. It is important to know which alloy is to be welded. A system of four-digit numbers has been developed by the Aluminium Association, Inc., to designate the various wrought Aluminium alloy types. This system of alloy groups, shown by table 7-20, is as follows:


(1) 1XXX series. These are Aluminiums of 99 percent or higher purity which are used primarily in the electrical and chemical industries.

(2) 2XXX series. Copper is the principal alloy in this group, which provides extremely high strength when properly heat treated. These alloys do not produce as good corrosion resistance and are often clad with pure Aluminium or special-alloy Aluminium. These alloys are used in the aircraft industry.

(3) 3XXX series. Manganese is the major alloying element in this group, which is non-heat-treatable. Manganese content is limited to about 1.5 percent. These alloys have moderate strength and are easily worked.

(4) 4XXX series. Silicon is the major alloying element in this group. It can be added in sufficient quantities to substantially reduce the melting point and is used for brazing alloys and welding electrodes. Most of the alloys in this group are non-heat-treatable.

(5) 5XXX series. Magnesium is the major alloying element of this group, which are alloys of medium strength. They possess good welding characteristics and good resistance to corrosion, but the amount of cold work should be limited.

(6) 6XXX series. Alloys in this group contain silicon and magnesium, which make them heat treatable. These alloys possess medium strength and good corrosion resistance.

(7) 7XXX series. Zinc is the major alloying element in this group. Magnesium is also included in most of these alloys. Together, they form a heat-treatable alloy of very high strength, which is used for aircraft frames.

c. Aluminium Welding

Welding Aluminium Alloys. Aluminium possesses a number of properties that make welding it different than the welding of steels. These are: Aluminium oxide surface coating; high thermal conductivity; high thermal expansion coefficient; low melting temperature; and the absence of color change as temperature approaches the melting point. The normal metallurgical factors that apply to other metals apply to Aluminium as well.

(1) Aluminium is an active metal which reacts with oxygen in the air to produce a hard, thin film of Aluminium oxide on the surface. The melting point of Aluminium oxide is approximately 3600ºF (1982ºC) which is almost three times the melting point of pure Aluminium (1220ºF (660ºC)). In addition, this Aluminium oxide film absorbs moisture from the air, particularly as it becomes thicker. Moisture is a source of hydrogen, which causes porosity in Aluminium welds. Hydrogen may also come from oil, paint, and dirt in the weld area. It also comes from the oxide and foreign materials on the electrode or filler wire, as well as from the base metal. Hydrogen will enter the weld pool and is soluble in molten Aluminium. As the Aluminium solidifies, it will retain much less hydrogen. The hydrogen is rejected during solidification. With a rapid cooling rate, free hydrogen is retained within the weld and will cause porosity. Porosity will decrease weld strength and ductility, depending on the amount.

Aluminium Welding

Aluminium and Aluminium alloys should not be cleaned with caustic soda or cleaners with a pH above 10, as they may react chemically.

(a) The Aluminium oxide film must be removed prior to welding. If it is not completely removed, small particles of unmelted oxide will be trapped in the weld pool and will cause a reduction in ductility, lack of fusion, and possibly weld cracking.

Aluminium Welding

(b) The Aluminium oxide can be removed by mechanical, chemical, or electrical means. Mechanical removal involves scraping with a sharp tool, sandpaper, wire brush (stainless steel), filing, or any other mechanical method. Chemical removal can be done in two ways. One is by use of cleaning solutions, either the etching types or the nonetching types. The nonetching types should be used only when starting with relatively clean parts, and are used in conjunction with other solvent cleaners. For better cleaning, the etching type solutions are recommended, but must be used with care. When dipping is employed, hot and cold rinsing is highly recommended. The etching type solutions are alkaline solutions. The time in the solution must be controlled so that too much etching does not occur.

Aluminium Welding

(c) Chemical cleaning includes the use of welding fluxes. Fluxes are used for gas welding, brazing, and soldering. The coating on covered Aluminium electrodes also maintains fluxes for cleaning the base metal. Whenever etch cleaning or flux cleaning is used, the flux and alkaline etching materials must be completely removed from the weld area to avoid future corrosion.

Aluminium Welding

(d) The electrical oxide removal system uses cathodic bombardment. Cathodic bombardment occurs during the half cycle of alternating current gas tungsten arc welding when the electrode is positive (reverse polarity). This is an electrical phenomenon that actually blasts away the oxide coating to produce a clean surface. This is one of the reasons why AC gas tungsten arc welding is so popular for welding Aluminium.

Aluminium Welding

(e) Since Aluminium is so active chemically, the oxide film will immediately start to reform. The time of buildup is not extremely fast, but welds should be made after Aluminium is cleaned within at least 8 hours for quality welding. If a longer time period occurs, the quality of the weld will decrease.

Aluminium Welding


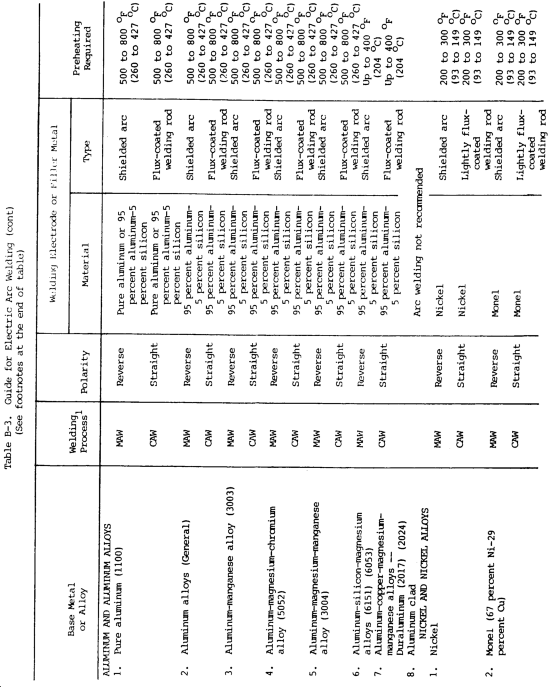
(2) Aluminium has a high thermal conductivity and low melting temperature. It conducts heat three to five times as fast as steel, depending on the specific alloy. More heat must be put into the Aluminium, even though the melting temperature of Aluminium is less than half that of steel. Because of the high thermal conductivity, preheat is often used for welding thicker sections. If the temperature is too high or the time period is too long, weld joint strength in both heat-treated and work-hardened alloys may be diminished. The preheat for Aluminium should not exceed 400ºF (204ºC), and the parts should not be held at that temperature longer than necessary. Because of the high heat conductivity, procedures should utilize higher speed welding processes using high heat input. Both the gas tungsten arc and the gas metal arc processes supply this requirement. The high heat conductivity of Aluminium can be helpful, since the weld will solidify very quickly if heat is conducted away from the weld extremely fast. Along with surface tension, this helps hold the weld metal in position and makes all-position welding with gas tungsten arc and gas metal arc welding practical.

(3) The thermal expansion of Aluminium is twice that of steel. In addition, Aluminium welds decrease about 6 percent in volume when solidifying from the molten state. This change in dimension may cause distortion and cracking.

(4) The final reason Aluminium is different from steels when welding is that it does not exhibit color as it approaches its melting temperature until it is raised above the melting point, at which time it will glow a dull red. When soldering or brazing Aluminium with a torch, flux is used. The flux will melt as the temperature of the base metal approaches the temperature required. The flux dries out first, and melts as the base metal reaches the correct working temperature. When torch welding with oxyacetylene or oxyhydrogen, the surface of the base metal will melt first and assume a characteristic wet and shiny appearance. (This aids in knowing when welding temperatures are reached.) When welding with gas tungsten arc or gas metal arc, color is not as important, because the weld is completed before the adjoining area melts.

d. Aluminium Welding Metal-Arc Welding of Aluminium.

(1) Plate welding. Because of the difficulty of controlling the arc, butt and fillet welds are difficult to produce in plates less than 1/8 in. (3.2 mm) thick. When welding plate heavier than 1/8 in. (3.2 mm), a joint prepared with a 20 degree bevel will have strength equal to a weld made by the oxyacetylene process. This weld may be porous and unsuitable for liquid-or gas-tight joints. Metal-arc welding is, however, particularly suitable for heavy material and is used on plates up to 2-1/2 in. (63.5 mm) thick.

(2) Current and polarity settings. The current and polarity settings will vary with each manufacturer’s type of electrodes. The polarity to be used should be determined by trial on the joints to be made.

(3) Plate edge preparation. In general, the design of welded joints for Aluminium is quite consistent with that for steel joints. However, because of the higher fluidity of Aluminium under the welding arc, some important general principles should be kept in mind. With the lighter gauges of Aluminium sheet, less groove spacing is advantageous when weld dilution is not a factor. The controlling factor is joint preparation. A specially designed V groove that is applicable to Aluminium is shown in A, figure 7-11. This type of joint is excellent where welding can be done from one side only and where a smooth, penetrating bead is desired. The effectiveness of this particular design depends upon surface tension, and should be applied on all material over 1/8 in. (3.2 mm) thick. The bottom of the special V groove must be wide enough to contain the root pass completely. This requires adding a relatively large amount of filler alloy to fill the groove. Excellent control of the penetration and sound root pass welds are obtained. This edge preparation can be employed for welding in all positions. It eliminates difficulties due to burn-through or over-penetration in the overheat and horizontal welding positions. It is applicable to all weldable base alloys and all filler alloys.


e. Aluminium Welding Gas Metal-Arc (MIG) Welding (GMAW).

(1) General. This fast, adaptable process is used with direct current re-verse polarity and an inert gas to weld heavier thicknesses of Aluminium alloys, in any position, from 1/016 in. (1.6 mm) to several inches thick. TM 5-3431-211-15 describes the operation of a typical MIG welding set.

(2) Shielding gas. Precautions should be taken to ensure the gas shield is extremely efficient. Welding grade argon, helium, or a mixture of these gases is used for Aluminium welding. Argon produces a smother and more stable arc than helium. At a specific current and arc length, helium provides deeper penetration and a hotter arc than argon. Arc voltage is higher with helium, and a given change in arc length results in a greater change in arc voltage. The bead profile and penetration pattern of Aluminium welds made with argon and helium differ. With argon, the bead profile is narrower and more convex than helium. The penetration pattern shows a deep central section. Helium results in a flatter, wider bead, and has a broader under-bead penetration pattern. A mixture of approximately 75 percent helium and 25 percent argon provides the advantages of both shielding gases with none of the undesirable characteristics of either. Penetration pattern and bead contour show the characteristics of both gases. Arc stability is comparable to argon. The angle of the gun or torch is more critical when welding Aluminium with inert shielding gas. A 30º leading travel angle is recommended. The electrode wire tip should be oversize for Aluminium. Table 7-21 provides welding procedure schedules for gas metal-arc welding of Aluminium.


(3) Aluminium Welding Welding technique. The electrode wire must be clean. The arc is struck with the electrode wire protruding about 1/2 in. (12.7 mm) from the cup. A frequently used technique is to strike the arc approximately 1.0 in. (25.4 mm) ahead of the beginning of the weld and then quickly bring the arc to the weld starting point, reverse the direction of travel, and proceed with normal welding. Alternatively, the arc may be struck outside the weld groove on a starting tab. When finishing or terminating the weld, a similar practice may be followed by reversing the direction of welding, and simultaneously increasing the speed of welding to taper the width of the molten pool prior to breaking the arc. This helps to avert craters and crater cracking. Runoff tabs are commonly used. Having established the arc, the welder moves the electrode along the joint while maintaining a 70 to 85 degree forehand angle relative to the work. A string bead technique is normally preferred. Care should be taken that the forehand angle is not changed or increased as the end of the weld is approached. Arc travel speed controls the bead size. When welding Aluminium with this process, it is must important that high travel speeds be maintained. When welding uniform thicknesses, the electrode to work angle should be equal on both sides of the weld. When welding in the horizontal position, best results are obtained by pointing the gun slightly upward. When welding thick plates to thin plates, it is helpful to direct the arc toward the heavier section. A slight backhand angle is sometimes helpful when welding thin sections to thick sections. The root pass of a joint usually requires a short arc to provide the desired penetration. Slightly longer arcs and higher arc voltages may be used on subsequent passes.

The wire feeding equipment for Aluminium welding must be in good adjustment for efficient wire feeding. Use nylon type liners in cable assemblies. Proper drive rolls must be selected for the Aluminium wire and for the size of the electrode wire. It is more difficult to push extremely small diameter Aluminium wires through long gun cable assemblies than steel wires. For this reason, the spool gun or the newly developed guns which contain a linear feed motor are used for the small diameter electrode wires. Water-cooled guns are required except for low-current welding. Both the constant current (CC) power source with matching voltage sensing wire feeder and the constant voltage (CV) power source with constant speed wire feeder are used for welding Aluminium. In addition, the constant speed wire feeder is sometimes used with the constant current power source. In general, the CV system is preferred when welding on thin material and using all diameter electrode wire. It provides better arc starting and regulation. The CC system is preferred when welding thick material using larger electrode wires. The weld quality seems better with this system. The constant current power source with a moderate drop of 15 to 20 volts per 100 amperes and a constant speed wire feeder provide the most stable power input to the weld and the highest weld quality.

(4) Aluminium Welding Joint design. Edges may be prepared for welding by sawing, machining, rotary planing, routing or arc cutting. Acceptable joint designs are shown in figure 7-12.


f. Aluminium Welding Gas Tungsten-Arc (TIG) Welding (GTAW).

(1) The gas tungsten arc welding process is used for welding the thinner sections of Aluminium and Aluminium alloys. There are several precautions that should be mentioned with respect to using this process.

(a) Alternating current is recommended for general-purpose work since it provides the half-cycle of cleaning action. Table 7-22 provides welding procedure schedules for using the process on different thicknesses to produce different welds. AC welding, usually with high frequency, is widely used with manual and automatic applications. Procedures should be followed closely and special attention given to the type of tungsten electrode, size of welding nozzle, gas type, and gas flow rates. When manual welding, the arc length should be kept short and equal to the diameter of the electrode. The tungsten electrode should not protrude too far beyond the end of the nozzle. The tungsten electrode should be kept clean. If it does accidentally touch the molten metal, it must be redressed.


(b) Aluminium WeldingWelding power sources designed for the gas tungsten arc welding process should be used. The newer equipment provides for programming, pre-and post-flow of shielding gas, and pulsing.

(c) Aluminium Welding For automatic or machine welding, direct current electrode negative (straight polarity) can be used. Cleaning must be extremely efficient, since there is no cathodic bombardment to assist. When dc electrode negative is used, extremely deep penetration and high speeds can be obtained. Table 7-23 lists welding procedure schedules for dc electrode negative welding.


(d) The Aluminium Welding shielding gases are argon, helium, or a mixture of the two. Argon is used at a lower flow rate. Helium increases penetration, but a higher flow rate is required. When filler wire is used, it must be clean. Oxide not removed from the filler wire may include moisture that will produce polarity in the weld deposit.

(2) Alternating current.

(a) Characteristics of process. The Aluminium Welding of Aluminium by the gas tungsten-arc welding process using alternating current produces an oxide cleaning action. Argon shielding gas is used. Better results are obtained when welding Aluminium with alternating current by using equipment designed to produce a balanced wave or equal current in both directions. Unbalance will result in loss of power and a reduction in the cleaning action of the arc. Characteristics of a stable arc are the absence of snapping or cracking, smooth arc starting, and attraction of added filler metal to the weld puddle rather than a tendency to repulsion. A stable arc results in fewer tungsten inclusions.

(b) Aluminium Welding technique. For manual welding of Aluminium with ac, the electrode holder is held in one hand and filler rod, if used, in the other. An initial arc is struck on a starting block to heat the electrode. The arc is then broken and reignited in the joint. This technique reduces the tendency for tungsten inclusions at the start of the weld. The arc is held at the starting point until the metal liquefies and a weld pool is established. The establishment and maintenance of a suitable weld pool is important, and welding must not proceed ahead of the puddle. If filler metal is required, it may be added to the front or leading edge of the pool but to one side of the center line. Both hands are moved in unison with a slight backward and forward motion along the joint. The tungsten electrode should not touch the filler rod. The hot end of the filler rod should not be withdrawn from the argon shield. A short arc length must be maintained to obtain sufficient penetration and avoid undercutting, excessive width of the weld bead, and consequent loss of penetration control and weld contour. One rule is to use an arc length approximately equal to the diameter of the tungsten electrode. When the arc is broken, shrinkage cracks may occur in the weld crater, resulting in a defective weld. This defect can be prevented by gradually lengthening the arc while adding filler metal to the crater. Then, quickly break and restrike the arc several times while adding additional filler metal to the crater, or use a foot control to reduce the current at the end of the weld. Tacking before welding is helpful in controlling distortion. Tack welds should be of ample size and strength and should be chipped out or tapered at the ends before welding over.

(c) Aluminium Welding Joint design. The joint designs shown in figure 7-11 are applicable to the gas tungsten-arc welding process with minor exceptions. Inexperienced welders who cannot maintain a very short arc may require a wider edge preparation, included angle, or joint spacing. Joints may be fused with this process without the addition of filler metal if the base metal alloy also makes a satisfactory filler alloy. Edge and corner welds are rapidly made without addition of filler metal and have a good appearance, but a very close fit is essential.

(3) Aluminium Welding Direct current straight polarity.

(a) Charcteristics of process. This process, using helium and thoriated tungsten electrodes is advantageous for many automatic welding operations, especially in the welding of heavy sections. Since there is less tendency to heat the electrode, smaller electrodes can be used for a given welding current. This will contribute to keeping the weld bead narrow. The use of direct current straight polarity (dcsp) provides a greater heat input than can be obtained with ac current. Greater heat is developed in the weld pool, which is consequently deeper and narrower.

(b) Aluminium Welding techniques. A high frequency current should be used to initiate the arc. Touch starting will contaminate the tungsten electrode. It is not necessary to form a puddle as in ac welding, since melting occurs the instant the arc is struck. Care should be taken to strike the arc within the weld area to prevent undesirable marking of the material. Standard techniques such as runoff tabs and foot operated heat controls are used. These are helpful in preventing or filling craters, for adjusting the current as the work heats, and to adjust for a change in section thickness. In dcsp welding, the torch is moved steadily forward. The filler wire is fed evenly into the leading edge of the weld puddle, or laid on the joint and melted as the arc roves forward. In all cases, the crater should be filled to a point above the weld bead to eliminate crater cracks. The fillet size can be controlled by varying filler wire size. DCSP is adaptable to repair work. Preheat is not required even for heavy sections, and the heat affected zone will be smaller with less distortion.

(c) Aluminium Welding Joint designs. The joint designs shown in figure 7-11 are applicable to the automatic gas tungsten-arc dcsp welding process with minor exceptions. For manual dcsp, the concentrated heat of the arc gives excellent root fusion. Root face can be thicker, grooves narrower, and build up can be easily controlled by varying filler wire size and travel speed.

g. Aluminium Welding Square Wave Alternating Current Welding (TIG).

(1) General. Square wave gas tungsten-arc welding with alternating current differs frozen conventional balanced wave gas tungsten-arc welding in the type of wave from used. With a square wave, the time of current flow in either direction is adjustable from 20 to 1. In square wave gas tungsten-arc welding, there are the advantages of surface cleaning produced by positive ionic bombardment during the reversed polarity cycle, along with greater weld depth to width ratio produced by the straight polarity cycle. Sufficient Aluminium surface cleaning action has been obtained with a setting of approximately 10 percent dcrp. Penetration equal to regular dcsp welding can be obtained with 90 percent dcsp current.

(2) Aluminium Welding technique. It is necessary to have either superimposed high frequency or high open circuit voltage, because the arc is extinguished every half cycle as the current decays toward zero, and must be restarted each tire. Precision shaped thoriated tungsten electrodes should be used with this process. Argon, helium, or a combination of the two should be used as shielding gas, depending on the application to be used.

(3) Aluminium Welding Joint design. Square wave alternating current welding offers substantial savings over conventional alternating current balanced wave gas tungsten arc welding in weld joint preparation. Smaller V grooves, U grooves, and a thicker root face can be used. A greater depth to width weld ratio is conducive to less weldment distortion, along with favorable welding residual stress distribution and less use of filler wire. With Some slight modification, the same joint designs can be used as in dcsp gas tungsten-arc welding (fig. 7-11).

h. Aluminium Welding Shielded Metal-Arc Welding. In the shielded metal-arc welding process, a heavy dipped or extruded flux coated electrode is used with dcrp. The electrodes are covered similarly to conventional steel electrodes. The flux coating provides a gaseous shield around the arc and molten Aluminium puddle, and chemically combines and removes the Aluminium oxide, forming a slag. When welding Aluminium, the process is rather limited due to arc spatter, erratic arc control, limitations on thin material, and the corrosive action of the flux if it is not removed properly.

i. Aluminium Welding Shielded Carbon-Arc Welding. The shielded carbon-arc welding process can be used in joining Aluminium. It requires flux and produces welds of the same appearance, soundness, and structure as those produced by either oxyacetylene or oxyhydrogen welding. Shielded carbon-arc welding is done both manually and automatically. A carbon arc is used as a source of heat while filler metal is supplied from a separate filler rod. Flux must be removed after welding; otherwise severe corrosion will result. Manual shielded carbon-arc welding is usually limited to a thickness of less than 3/8 in. (9.5 mm), accomplished by the same method used for manual carbon arc welding of other material. Joint preparation is similar to that used for gas welding. A flux covered rod is used.

j. Aluminium Welding Atomic Hydrogen Welding. This welding process consists of maintaining an arc between two tungsten electrodes in an atmosphere of hydrogen gas. The process can be either manual or automatic with procedures and techniques closely related to those used in oxyacetylene welding. Since the hydrogen shield surrounding the base metal excludes oxygen, smaller amounts of flux are required to combine or remove Aluminium oxide. Visibility is increased, there are fewer flux inclusions, and a very sound metal is deposited.

k. Aluminium Welding Stud Welding.

(1) Aluminium stud welding may be accomplished with conventional arc stud welding equipment, using either the capacitor discharge or drawn arc capacitor discharge techniques. The conventional arc stud welding process may be used to weld Aluminium studs 3/16 to 3/4 in. (4.7 to 19.0 mm) diameter. The Aluminium stud welding gun is modified slightly by the addition of a special adapter for the control of the high purity shielding gases used during the welding cycle. An added accessory control for controlling the plunging of the stud at the completion of the weld cycle adds materially to the quality of weld and reduces spatter loss. Reverse polarity is used, with the electrode gun positive and the workpiece negative. A small cylindrical or cone shaped projection on the end of the Aluminium stud initiates the arc and helps establish the longer arc length required for Aluminium welding.

(2) The unshielded capacitor discharge or drawn arc capacitor discharge stud welding processes are used with Aluminium studs 1/16 to 1/4 in. (1.6 to 6.4 mm) diameter. Capacitor discharge welding uses a low voltage electrostatic storage system, in which the weld energy is stored at a low voltage in capacitors with high capacitance as a power source. In the capacitor discharge stud welding process, a small tip or projection on the end of the stud is used for arc initiation. The drawn arc capacitor discharge stud welding process uses a stud with a pointed or slightly rounded end. It does not require a serrated tip or projection on the end of the stud for arc initiation. In both cases, the weld cycle is similar to the conventional stud welding process. However, use of the projection on the base of the stud provides the most consistent welding. The short arcing time of the capacitor discharge process limits the melting so that shallow penetration of the workpiece results. The minimum Aluminium work thickness considered practical is 0.032 in. (0.800 mm).

l. Electron Beam Welding. Electron beam welding is a fusion joining process in which the workpiece is bombarded with a dense stream of high velocity electrons, and virtually all of the kinetic energy of the electrons is transformed into heat upon impact. Electron beam welding usually takes place in an evacuated chamber. The chamber size is the limiting factor on the weldment size. Conventional arc and gas heating melt little more than the surface. Further penetration comes solely by conduction of heat in all directions from this molten surface spot. The fusion zone widens as it depends. The electron beam is capable of such intense local heating that it almost instantly vaporizes a hole through the entire joint thickness. The walls of this hole are molten, and as the hole is moved along the joint, more metal on the advancing side of the hole is melted. This flaws around the bore of the hole and solidifies along the rear side of the hole to make the weld. The intensity of the beam can be diminished to give a partial penetration with the same narrow configuration. Electron beam welding is generally applicable to edge, butt, fillet, melt-thru lap, and spot welds. Filler metal is rarely used except for surfacing.

m. Aluminium Welding Resistance Welding.

(1) Aluminium Welding General. The resistance welding processes (spot, seam, and flash welding) are important in fabricating Aluminium alloys. These processes are especially useful in joining the high strength heat treatable alloys, which are difficult to join by fusion welding, but can be joined by the resistance welding process with practically no loss in strength. The natural oxide coating on Aluminium has a rather high and erratic electrical resistance. To obtain spot or seam welds of the highest strength and consistency, it is usually necessary to reduce this oxide coating prior to welding.

(2) Aluminium Welding Spot welding. Welds of uniformly high strength and good appearance depend upon a consistently low surface resistance between the workplaces. For most applications, some cleaning operations are necessary before spot or seam welding Aluminium. Surface preparation for welding generally consists of removal of grease, oil, dirt, or identification markings, and reduction and improvement of consistency of the oxide film on the Aluminium surface. Satisfactory performance of spot welds in service depends to a great extent upon joint design. Spot welds should always be designed to carry shear loads. However, when tension or combined loadings may be expected, special tests should be conducted to determine the actual strength of the joint under service loading. The strength of spot welds in direct tension may vary from 20 to 90 percent of the shear strength.

(3) Aluminium Welding Seam welding. Seam welding of Aluminium and its alloys is very similar to spot welding, except that the electrodes are replaced by wheels. The spots made by a seam welding machine can be overlapped to form a gas or liquid tight joint. By adjusting the timing, the seam welding machine can produce uniformly spaced spot welds equal in quality to those produced on a regular spot welding machine, and at a faster rate. This procedure is called roll spot or intermittent seam welding.

(4) Aluminium Welding Flash welding. All Aluminium alloys may be joined by the flash welding process. This process is particularly adapted to making butt or miter joints between two parts of similar cross section. It has been adapted to joining Aluminium to copper in the form of bars and tubing. The joints so produced fail outside of the weld area when tension loads are applied.

n. Aluminium Welding Gas welding. Gas welding has been done on Aluminium using both oxyacetylene and oxyhydrogen flames. In either case, an absolutely neutral flame is required. Flux is used as well as a filler rod. The process also is not too popular because of low heat input and the need to remove flux.

o. Aluminium Welding Electroslag welding. Electroslag welding is used for joining pure Aluminium, but is not successful for welding the Aluminium alloys. Submerged arc welding has been used in some countries where inert gas is not available.

p. Aluminium Welding Other processes. Most of the solid state welding processes, including friction welding, ultrasonic welding, and cold welding are used for Aluminiums. Aluminium can also be joined by soldering and brazing. Brazing can be accomplished by most brazing methods. A high silicon alloy filler material is used.

Welding Theory & Application – Table Of Contents

WELDING THEORY AND APPLICATION

Table of Contents

LIST OF ILLUSTRATIONS

LIST OF TABLES

WARNINGS

CHAPTER 1 – INTRODUCTION

Section I – General

Section II – Theory

CHAPTER 2 – SAFETY PRECAUTIONS IN WELDING OPERATIONS

Section I – General Safety Precautions

Section II – Safety Precautions in Oxyfuel Welding

Section III – Safety in Arc Welding and Cutting

Section IV – Safety Precautions for Gas Shielded Arc Welding

Section V – Safety Precautions for Welding and Cutting Containers That Have Held Combustibles

Section VI – Safety Precautions for Welding and Cutting Polyurethane Foam Filled Assemblies

CHAPTER 3 – PRINT READING AND WELDING SYMBOLS

Section I – Print Reading

Section II – Weld and Welding Symbols

CHAPTER 4 – JOINT DESIGN AND PREPARATION OF METALS

CHAPTER 5 – WELDING AND CUTTING EQUIPMENT

Section I – Oxyacetylene Welding Equipment

Section II – Oxyacetylene Cutting Equipment

Section III – Arc Welding Equipment and Accessories

Section IV – Resistance Welding Equipment

Section V – Thermit Welding Equipment

Section VI – Forge Welding Tools and Equipment

CHAPTER 6 – WELDING TECHNIQUES

Section I – Description

Section II – Nomenclature of the Weld

Section III – Types of Welds and Welded Joints

Section IV – Welding Positions

Section V – Expansion and Contraction in Welding Operations

Section VI – Welding Problems and Solutions

CHAPTER 7 – METALS IDENTIFICATION

Section I – Characteristics

Section II – Standard Metal Designations

Section III – General Description and Weldability of Ferrous Metals

Section IV – General Description and Weldability of Nonferrous Metals

CHAPTER 8 – ELECTRODES AND FILLER METALS

Section I – Types of Electrodes

Section II – Other Filler Metals

CHAPTER 9 – MAINTENANCE WELDING OPERATIONS FOR MILITARY EQUIPMENT

CHAPTER 10 – ARC WELDING AND CUTTING PROCESSES

Section I – General

Section II – Arc Processes

Section III – Related Processes

CHAPTER 11 – OXYGEN FUEL GAS WELDING PROCEDURES

Section I – Welding Processes and Techniques

Section II – Welding and Brazing Ferrous Metals

Section III – Related Processes

Section IV – Welding, Brazing, and Soldering Nonferrous Metals

CHAPTER 12 – SPECIAL APPLICATIONS

Section I – Underwater Cutting and Welding with the Electric Arc

Section II – Underwater Cutting with Oxyfuel

Section III – Metallizing

Section IV – Flame Cutting Steel and Cast Iron

Section V – Flame Treating Metal

Section VI – Cutting and Hard Surfacing with the Electric Arc

Section VII – Armor Plate Welding and Cutting

Section VIII – Pipe Welding

Section IX – Welding Cast Iron, Cast Steel, Carbon Steel, and Forgings

Section X – Forge Welding

Section XI – Heat Treatment of Steel

Section XII – Other Welding Processes

CHAPTER 13 – DESTRUCTIVE AND NONDESTRUCTIVE TESTING

Section I – Performance Testing

Section II – Visual Inspection and Corrections

Section III – Physical Testing

APPENDIX A – REFERENCES

APPENDIX B – PROCEDURE GUIDES FOR WELDING

APPENDIX C – TROUBLESHOOTING PROCEDURES

APPENDIX D – MATERIALS USED FOR BRAZING, WELDING, SOLDERING, CUTTING, AND METALLIZING

APPENDIX E – MISCELLANEOUS DATA

GLOSSARY

Glossary

GLOSSARY


Section I. GENERAL

G-1. GENERAL

This glossary of welding terms has been prepared to acquaint welding personnel with nomenclatures and definitions of common terms related to welding and allied processes, methods, techniques, and applications.

G-2. SCOPE

The welding terms listed in section II of this chapter are those terms used to describe and define the standard nomenclatures and language used in this manual. This glossary is a very important part of the manual and should be carefully studied and regularly referred to for better understanding of common welding terms and definitions.  Terms and nomenclatures listed herein are grouped in alphabetical order.

Section II. WELDING TERMS

G-3. WELDING TERMS

A
ACETONE:

A flammable, volatile liquid used in acetylene cylinders to dissolve and stabilize acetylene under high pressure.

ACETYLENE:

A highly combustible gas composed of carbon and hydrogen. Used as a fuel gas in the oxyacetylene welding process.

ACTUAL THROAT:

See THROAT OF FILLET WELD.

AIR-ACETYLENE:

A low temperature flare produced by burning acetylene with air instead of oxygen.

AIR-ARC CUTTING:

An arc cutting process in which metals to be cut are melted by the heat of the carbon arc.

ALLOY:

A mixture with metallic properties composed of two or more elements, of which at least one is a metal.

ALTERNATING CURRENT:

An electric current that reverses its direction at regularly recurring intervals.

AMMETER:

An instrument for measuring electrical current in amperes by an indicator activated by the movement of a coil in a magnetic field or by the longitudinal expansion of a wire carrying the current.

ANNEALING:

A comprehensive term used to describe the heating and cooling cycle of steel in the solid state.  The term annealing usually implies relatively slow cooling.  In annealing, the temperature of the operation, the rate of heating and cooling, and the time the metal is held at heat depend upon the composition, shape, and size of the steel product being treated, and the purpose of the treatment.  The more important purposes for which steel is annealed are as follows: to remove stresses; to induce softness; to alter ductility, toughness, electric, magnetic, or other physical and mechanical properties; to change the crystalline structure; to remove gases; and to prduce a definite microstructure.

ARC BLOW:

The deflection of an electric arc from its normal path because of magnetic forces.

ARC BRAZING:

A brazing process wherein the heat is obtained from an electric arc formed between the base metal and an electrode, or between two electrodes.

ARC CUTTING:

A group of cutting processes in which the cutting of metals is accomplished by melting with the heat of an arc between the electrode and the base metal.  See CARBON-ARC CUTTING, METAL-ARC CUTTIING, ARC-OXYGEN CUTTING, AND AIR-ARC CUTTING.

ARC LENGTH:

The distance between the tip of the electrode and the weld puddle.


ARC-OXYGEN CUTTING:
An oxygen-cutting process used to sever metals by a chemical reaction of oxygen with a base metal at elevated temperatures.

ARC VOLTAGE:

The voltage across the welding arc.


ARC WELDING:
A group of welding processes in which fusion is obtained by heating with an electric arc or arcs, with or without the use of filler metal.

AS WELDED:

The condition of weld metal, welded joints, and weldments after welding and prior to any subsequent thermal, mechanical, or chemical treatments.

ATOMIC HYDROGEN WELDING:

An arc welding process in which fusion is obtained by heating with an arc maintained between two metal electrodes in an atmosphere of hydrogen.  Pressure and/or filler metal may or may not be used.

AUSTENITE:

The non-magnetic form of iron characterized by a face-centered cubic lattice crystal structure.  It is produced by heating steel above the upper critical temperature and has a high solid solubility for carbon and alloying elements.

AXIS OF A WELD:

A line through the length of a weld, perpendicular to a cross section at its center of gravity.

B
BACK FIRE:

The momentary burning back of a flame into the tip, followed by a snap or pop, then immediate reappearance or burning out of the flame.

BACK PASS:

A pass made to deposit a back weld.

BACK UP:

In flash and upset welding, a locator used to transmit all or a portion of the upsetting force to the workpieces.

BACK WELD:

A weld deposited at the back of a single groove weld.

BACKHAND WELDING:

A welding technique in which the flame is directed towards the completed weld.

BACKING STRIP:

A piece of material used to retain molten metal at the root of the weld and/or increase the thermal capacity of the joint so as to prevent excessive warping of the base metal.

BACKING WELD:

A weld bead applied to the root of a single groove joint to assure complete root penetration.

BACKSTEP:

A sequence in which weld bead increments are deposited in a direction opposite to the direction of progress.

BARE ELECTRODE:

An arc welding electrode that has no coating other than that incidental to the drawing of the wire.

BARE METAL-ARC WELDING:

An arc welding process in which fusion is obtained by heating with an unshielded arc between a bare or lightly coated electrode and the work.  Pressure is not used and filler metal is obtained from the electrode.

BASE METAL:

The metal to be welded or cut.  In alloys, it is the metal present in the largest proportion.

BEAD WELD:

A type of weld composed of one or more string or weave beads deposited on an unbroken surface.

BEADING:

See STRING BEAD WELDING and WEAVE BEAD.

BEVEL ANGLE:

The angle formed between the prepared edge of a member and a plane perpendicular to the surface of the member.

BLACKSMITH WELDING:

See FORGE WELDING.

BLOCK BRAZING:

A brazing process in which bonding is produced by the heat obtained from heated blocks applied to the parts to be joined and by a nonferrous filler metal having a melting point above 800 °F (427 °C), but below that of the base metal.  The filler metal is distributed in the joint by capillary attraction.

BLOCK SEQUENCE:

A building up sequence of continuous multipass welds in which separated lengths of the weld are completely or partially built up before intervening lengths are deposited. See BUILDUP SEQUENCE.

BLOW HOLE:

see GAS POCKET.

BOND:

The junction of the welding metal and the base metal.

BOXING:

The operation of continuing a fillet weld around a corner of a member as an extension of the principal weld.

BRAZING:

A group of welding processes in which a groove, fillet, lap, or flange joint is bonded by using a nonferrous filler metal having a melting point above 800 °F (427 °C), but below that of the base metals. Filler metal is distributed in the joint by capillary attraction.

BRAZE WELDING:

A method of welding by using a filler metal that liquifies above 450 °C (842 °F) and below the solid state of the base metals. Unlike brazing, in braze welding, the filler metal is not distributed in the joint by capillary action.

BRIDGING:

A welding defect caused by poor penetration. A void at the root of the weld is spanned by weld metal.

BUCKLING:

Distortion caused by the heat of a welding process.

BUILDUP SEQUENCE:

The order in which the weld beads of a multipass weld are deposited with respect to the cross section of a joint.  See BLOCK SEQUENCE.

BUTT JOINT:

A joint between two workpieces in such a manner that the weld joining the parts is between the surface planes of both of the pieces joined.

BUTT WELD:

A weld in a butt joint.

BUTTER WELD:

A weld caused of one or more string or weave beads laid down on an unbroken surface to obtain desired properties or dimensions.

C
CAPILLARY ATTRACTION:

The phenomenon by which adhesion between the molten filler metal and the base metals, together with surface tension of the molten filler metal, causes distribution of the filler metal between the properly fitted surfaces of the joint to be brazed.

CARBIDE PRECIPITATION:

A condition occurring in austenitic stainless steel which contains carbon in a supersaturated solid solution.  This condition is unstable. Agitation of the steel during welding causes the excess carbon in solution to precipitate.  This effect is also called weld decay.

CARBON-ARC CUTTING:

A process of cutting metals with the heat of an arc between a carbon electrode and the work.

CARBON-ARC WELDING:

A welding process in which fusion is produced by an arc between a carbon electrode and the work.  Pressure and/or filler metal and/or shielding may or may not be used.

CARBURIZING FLAME:

An oxyacetylene flame in which there is an excess of acetylene. Also called excess acetylene or reducing flame.

CASCADE SEQUENCE:

Subsequent beads are stopped short of a previous bead, giving a cascade effect.

CASE HARDENING:

A process of surface hardening involving a change in the compsition of the outer layer of an iron base alloy by inward diffusion from a gas or liquid, followed by appropriate thermal treatment. Typical hardening processes are carburizing, cyaniding, carbonitriding, and nitriding.

CHAIN INTERMITTENT FILLET WELDS:

Two lines of intermittent fillet welds in a T or lap joint in which the welds in one line are approximately opposite those in the other line.

CHAMFERING:

The preparation of a welding contour, other than for a square groove weld, on the edge of a joint member.

COALESCENCE:

The uniting or fusing of metals upon heating.

COATED ELECTRODE:

An electrode having a flux applied externally by dipping, spraying, painting, or other similar methods.  Upon burning, the coat produces a gas which envelopes the arc.

COMMUTORY CONTROLLED WELDING:

The making of a number of spot or projection welds in which several electrodes, in simultaneous contact with the work, progressively function under the control of an electrical commutating device.


COMPOSITE ELECTRODE:
A filler metal electrode used in arc welding, consisting of more than one metal component combined mechanically. It may or may not include materials that improve the properties of the weld, or stabilize the arc.

COMPOSITE JOINT:

A joint in which both a thermal and mechanical process are used  to unite the base metal parts.

CONCAVITY:

The maximum perpendicular distance from the face of a concave weld to a line joining the toes.

CONCURRENT HEATING:

Supplemental heat applied to a structure during the course of welding.

CONE:

The conical part of a gas flame next to the orifice of the tip.


CONSUMABLE INSERT:
Preplaced filler metal which is completely fused into the root of the joint and becomes part of the weld.

CONVEXITY:

The maximum perpendicular distance from the face of a convex fillet weld to a line joining the toes.

CORNER JOINT:

A joint between two members located approximately at right angles to each other in the form of an L.

COVER GLASS:

A clear glass used in goggles, hand shields, and helmets to protect the filter glass from spattering material.

COVERED ELECTRODE:

A metal electrode with a covering material which stabilizes the arc and improves the properties of the welding metal.  The material may be an external wrapping of paper, asbestos, and other materials or a flux covering.

CRACK:

A fracture type discontinuity characterized by a sharp tip and high ratio of length and width to opening displacement.

CRATER:

A depression at the termination of an arc weld.

CRITICAL TEMPERATURE:

The transition temperature of a substance fromm one crystalline form to another.

CURRENT DENSITY:

Amperes per square inch of the electrode cross sectional area.

CUTTING TIP:

A gas torch tip especially adapted for cutting.

CUTTING TORCH:

A device used in gas cutting for controlling the gases used for preheating and the oxygen used for cutting the metal

CYLINDER:

A portable cylindrical container used for the storage of a compressed gas.

D
DEFECT:

A discontinuity or discontinuities which, by nature or accumulated effect (for example, total crack length), render a part or product unable ot meet the minimum applicable acceptance standards or specifications. This term designates rejectability.

DEPOSITED METAL:

Filler metal that has been added during a welding operation.

DEPOSITION EFFICIENCY:

The ratio of the weight of deposited metal to the net weight of electrodes consumed, exclusive of stubs.

DEPTH OF FUSION:

The distance from the original surface of the base metal to that point at which fusion ceases in a welding operation.

DIE:

a.  Resistance Welding.  A member, usually shaped to the work contour, used to clamp the parts being welded and conduct the welding current.
b. Forge Welding.  A device used in forge welding primarily to form the work while hot and apply the necessary pressure.

DIE WELDING:

A forge welding process in which fusion is produced by heating in a furnace and by applying pressure by means of dies.

DIP BRAZING:

A brazing process in which bonding is produced by heating in a molten chemical or metal bath and by using a nonferrous filler metal having a melting point above 800 °F (427 °C), but below that of the base metals. The filler metal is distributed in the joint by capillary attraction.  When a metal bath is used, the bath provides the filler metal.

DIRECT CURRENT ELECTRODE NEGATIVE (DCEN):

The arrangement of direct current arc welding leads in which the work is the positive pole and the electrode is the negative pole of the welding arc.

DIRECT CURRENT ELECTRODE POSITIVE (DCEP):

The arrangenwmt of direct current arc welding leads in which the work is the negative pole and the electrode is the positive pole of the welding arc.

DISCONTINUITY:

An interruption of the typical structure of a weldment, such as lack of homogeneity in the mechanical, metallurgical, or physical characteristics of the material or weldment.  A discontinuity is not necessarily a defect.

DRAG:

The horizontal distance between the point of entrance and the point of exit of a cutting oxygen stream.

DUCTILITY:

The property of a metal which allows it to be permanently deformed, in tension, before final rupture.  Ductility is commonly evaluated by tensile testing in which the amunt of elongation and the reduction of area of the broken specimen, as compared to the original test specimen, are measured and calculated.

DUTY CYCLE:

The percentage of time during an arbitrary test period, usually 10 minutes, during which a power supply can be operated at its rated output without overloading.

E
EDGE JOINT:

A joint between the edges of two or more parallel or nearly parallel members.

EDGE PREPARATION:

The contour prepared on the edge of a joint member for welding

EFFECTIVE LENGTH OF WELD:

The length of weld throughout which the correctly proportined cross section exits.

ELECTRODE:

a. Metal-Arc.  Filler metal in the form of a wire or rod, whether bare or covered, through which current is conducted between the electrode holder and the arc.
b. Carbon-Arc.  A carbon or graphite rod through which current is conducted between the electrode holder and the arc.
c.Atomic Hydroqen.  One of the two tungsten rods between the points of which the arc is maintained.
d. Electrolytic Oxygen-Hydrogen Generation.  The conductors by which current enters and leaves the water, which is decomposed by the passage of the current.
e. Resistance Welding.  The part or parts of a resistance welding machine through which the welding current and the pressure are applied directly to the work.

ELECTRODE FORCE:

a. Dynamic.  In spot, seam, and projection welding, the force (pounds) between the electrodes during the actual welding cycle.
b. Theoretical.  In spot, seam, and projection welding, the force, neglecting friction and inertia, available at the electrodes of a resistance welding machine by virtue of the initial force application and the theoretical mechanical advantage of the system.
c. Static.  In spot, seam, and projection welding, the force between the electrodes under welding conditions, but with no current flowing and no movement in the welding machine.

ELECTRODE HOLDER:

A device used for mechanically holding the electrode and conduct- ing current to it.

ELECTRODE SKID:

The sliding of an electrode along the surface of the work during spot, seam, or projection welding.

EMBOSSMENT:

A rise or protrusion frcm the surface of a metal.

ETCHING:

A process of preparing metallic specimens and welds for macrographic or micrographic examination.

F
FACE REINFORCEMENT:

Reinforcement of weld at the side of the joint from which welding was done.

FACE OF WELD:

The exposed surface of a weld, made by an arc or gas welding process, on the side from which welding was done.

FAYING SURFACE:

That surface of a member that is in contact with another member to which it is joined.

FERRITE:

The virtually pure form of iron existing below the lower critical temperature and characterized by a body-centered cubic lattice crystal structure. It is magnetic and has very slight solid solubility for carbon.

FILLER METAL:

Metal to be added in making a weld.

FILLET WELD:

A weld of approximately triangular cross section, as used in a lap joint, joining two surfaces at approximately right angles to each other.

FILTER GLASS:

A colored glass used in goggles, helmets, and shields to exclude harmful light rays.

FLAME CUTTING:

see OXYGEN CUTTING.

FLAME GOUGING:

See OXYGEN GOUGING.

FLAME HARDENING:

A method for hardening a steel surface by heating with a gas flame followed by a rapid quench.

FLAME SOFTENING:

A method for softening steel by heating with a gas flame followed by slow cooling.

FLASH:

Metal and oxide expelled from a joint made by a resistance welding process.

FLASH WELDING:

A resistance welding process in which fusion is produced, simultaneously over the entire area of abutting surfaces, by the heat obtained from resistance to the flow of current between two surfaces and by the application of pressure after heating is substantially completed.  Flashing is accompanied by expulsion of metal from the joint.

FLASHBACK:

The burning of gases within the torch or beyond the torch in the hose, usually with a shrill, hissing sound.

FLAT POSITION:

The position in which welding is performed from the upper side of the joint and the face of the weld is approximately horizontal.

FILM BRAZING:

A process in which bonding is produced by heating with a molten nonferrous filler metal poured over the joint until the brazing temperature is attained. The filler metal is distributed in the joint by capillary attraction. See BRAZING.

FLOW WELDING:

A process in which fusion is produced by heating with molten filler metal poured over the surfaces to be welded until the welding temperature is attained and the required filler metal has been added. The filler metal is not distributed in the joint by capillary attraction.

FLUX:

A cleaning agent used to dissolve oxides, release trapped gases and slag, and to cleanse metals for welding, soldering, and brazing.

FOREHAND WELDING:

A gas welding technique in which the flare is directed against the base metal ahead of the completed weld.

FORGE WELDING:

A group of welding processes in which fusion is produced by heating in a forge or furnace and applying pressure or blows.

FREE BEND TEST:

A method of testing weld specimens without the use of a guide.

FULL FILLET WELD:

A fillet weld whose size is equal to the thickness of the thinner member joined.

FURNACE BRAZING:

A process in which bonding is produced by the furnace heat and a nonferrous filler metal having a melting point above 800 °F (427 °C), but below that of the base metals.  The filler metal is distributed in the joint by capillary attraction.

FUSION:

A thorough and complete mixing between the two edges of the base metal to be joined or between the base metal and the filler metal added during welding.

FUSION ZONE (FILLER PENETRATION):

The area of base metal melted as determined on the cross section of a weld.

G
GAS CARBON-ARC WELDING:

An arc welding process in which fusion is produced by heating with an electric arc between a carbon electrode and the work. Shielding is obtained fran an inert gas such as helium or argon.  Pressure and/or filler metal may or may not be used.

GAS METAL-ARC (MIG) WELDING (GMAW):

An arc welding process in which fusion is produced by heating with an electric arc between a metal electrode and the work. Shielding is obtained from an inert gas such as helium or argon. Pressure and/or filler metal may or my not be used.

GAS POCKET:

A weld cavity caused by the trapping of gases releasd by the metal when cooling.

GAS TUNGSTEN-ARC (TIG) WELDING (GTAW):

An arc welding process in which fusion is produced by heating with an electric arc between a tungsten electrode and the work while an inert gas forms around the weld area to prevent oxidation.  No flux is used.
GAS WELDING:

A process in which the welding heat is obtained from a gas flame.

GLOBULAR TRANSFER (ARC WELDING):

A type of metal transfer in which molten filler metal is transferred across the arc in large droplets.

GOGGLES:

A device with colored lenses which protect the eyes from harmful radiation during welding and cutting operations.

GROOVE:

The opening provided between two members to be joined by a groove weld.

GROOVE ANGLE:

The total included angle of the groove between parts to be joined by a groove weld.

GROOVE FACE:

That surface of a member included in the groove.

GROOVE RADIUS:

The radius of a J or U groove.

GROOVE WELD:

A weld made by depositing filler metal in a groove between two members to be joined.

GROUND CONNECTION:

The connection of the work lead to the work.

GROUND LEAD:

See WORK LEAD.

GUIDED BEND TEST:

A bending test in which the test specimen is bent to a definite shape by means of a jig.

H
HAMMER WELDING:

A forge welding process.

HAND SHIELD:

A device used in arc welding to protect the face and neck.  It is equipped with a filter glass lens and is designed to be held by hand.

HARD FACING:

A particular form of surfacing in which a coating or cladding is applied to a surface for the main purpose of reducing wear or loss of material by abrasion, impact, erosion, galling, and cavitation.

HARD SURFACING:

The application of a hard, wear-resistant alloy to the surface of a softer metal.

HARDENING:

a.  The heating and quenching of certain iron-base alloys from a temperature above the critical temperature range for the purpose of producing a hardness superior to that obtained when the alloy is not quenched.  This term is usually restricted to the formtion of martensite.
b. Any process of increasing the hardness of metal by suitable treatment, usually involving heating and cooling.

HEAT AFFECTED ZONE:

That portion of the base metal whose structure or properties have been changed by the heat of welding or cutting.

HEAT TIME:

The duration of each current impulse in pulse welding.

HEAT TREATMENT:

An operation or combination of operations involving the heating and cooling of a metal or an alloy in the solid state for the purpose of obtaining certain desirable conditions or properties.  Heating and cooling for the sole purpose of mechanical working are excluded frcm the meaning of the definition.

HEATING GATE:

The opening in a thermit mold through which the parts to be welded are preheated.

HELMET:

A device used in arc welding to protect the face and neck.  It is equipped with a filter glass and is designed to be worn on the head.

HOLD TIME:

The time that pressure is maintained at the electrodes after the welding current has stopped.

HORIZONTAL WELD:

A bead or butt welding process with its linear direction horizontal or inclined at an angle less than 45 degrees to the horizontal, and the parts welded being vertically or approximately vertically disposed.

HORN:

The electrode holding arm of a resistance spot welding machine.

HORN SPACING:

In a resistance welding machine, the unobstructed work clearance between horns or platens at right angles to the throat depth. This distance is measured with the horns parallel and horizontal at the end of the downstroke.

HOT SHORT:

A condition which occurs when a metal is heated to that point, prior to melting, where all strength is lost but the shape is still maintained.

HYDROGEN BRAZING:

A method of furnace brazing in a hydrogen atmosphere.

HYDROMATIC WELDING:

See PRESSURE CONTROLLED WELDING.

HYGROSCOPIC:

Readily absorbing and retaining moisture.

I
IMPACT TEST:

A test in which one or more blows are suddenly applied to a specimen.  The results are usually expressed in terms of energy absorbed or number of blows of a given intensity required to break the specimen.

IMPREGNATED-TAPE METAL-ARC WELDING

An arc welding process in which fusion is produced by heating with an electric arc between a metal electrode and the work.  Shielding is obtained from decomposition of impregnated tape wrapped around the electrode as it is fed to the arc.  Pressure is not used, and filler metal is obtained from the electrode.

INDUCTION BRAZTNG:

A process in which bonding is produced by the heat obtained from the resistance of the work to the flow of induced electric current and by using a nonferrous filler metal having a melting point above 800 °F (427 °C), but below that of the base metals.  The filler metal is distributed in the joint by capillary attraction.

INDUCTION WELDING:

A process in which fusion is produced by heat obtained from resistance of the work to the flow of induced electric current, with or without the application of pressure.

INERT GAS:

A gas which does not normally combine chemically with the base metal or filler metal.

INTERPASS TEMPERATURE:

In a multipass weld, the lowest temperature of the deposited weld meal before the next pass is started.

J
JOINT:

The portion of a structure in which separate base metal parts are joined.

JOINT PENETRATION:

The maximum depth a groove weld extends from its face into a joint, exclusive of reinforcement.

K
KERF:

The space from which metal has been removed by a cutting process.

L
LAP JOINT:

A joint between two overlapping members.

LAYER:

A stratum of weld metal, consisting of one or more weld beads.

LEG OF A FILLET WELD:

The distance from the root of the joint to the toe of the fillet weld.

LIQUIDUS:

The lowest temperature at which a metal or an alloy is completely liquid.

LOCAL PREHEATNG:

Preheating a specific portion of a structure.

LOCAL STRESS RELIEVING:

Stress relieving heat treatment of a specific portion of a structure.

M
MANIFOLD:

A multiple header for connecting several cylinders to one or more torch supply lines.

MARTENSITE:

Martensite is a microconstituent or structure in quenched steel characterized by an acicular or needle-like pattern on the surface of polish.  It has the maximum hardness of any of the structures resulting from the decomposition products of austenite.

MASH SEAM WELDING:

A seam weld made in a lap joint in which the thickness at the lap is reduced to approximately the thickness of one of the lapped joints by applying pressure while the metal is in a plastic state.

MELTING POINT:

The temperature at which a metal begins to liquefy.

MELTING RANGE:

The temperature range between solidus and liquidus.

MELTING RATE:

The weight or length of electrode melted in a unit of time.

METAL-ARC CUTTING:

The process of cutting metals by melting with the heat of the metal arc.

METAL-ARC WELDING:

An arc welding process in which a metal electrode is held so that the heat of the arc fuses both the electrode and the work to form a weld.

METALLIZING:

A method of overlay or metal bonding to repair worn parts.

MIXING CHAMBER:

That part of a welding or cutting torch in which the gases are mixed for combustion.

MULTI-IMPULSE WELDING:

The making of spot, projection, and upset welds by more than one impulse of current.  When alternating current is used each impulse may consist of a fraction of a cycle or a number of cycles.

N
NEUTRAL FLAME:

A gas flame in which the oxygen and acetylene volumes are balanced and both gases are completely burned.

NICK BREAK TEST:

A method for testing the soundness of welds by nicking each end of the weld, then giving the test specimen a sharp hammer blow to break the weld from nick to nick.  Visual inspection will show any weld defects.

NONFERROUS:

Metals which contain no iron. Aluminum, brass, bronze, copper, lead, nickel, and titanium are nonferrous.

NORMALIZING:

Heating iron-base alloys to approximately 100 °F (38 °C) above the critical temperature range followed by cooling to below that range in still air at ordinary temperature.

NUGGET:

The fused metal zone of a resistance weld.

O
OPEN CIRCUIT VOLTAGE:

The voltage between the terminals of the welding source when no current is flowing in the welding circuit.

OVERHEAD POSITION:

The position in which welding is performed from the underside of a joint and the face of the weld is approximately horizontal.

OVERLAP:

The protrusion of weld metal beyond the bond at the toe of the weld.

OXIDIZING FLAME:

An oxyacetylene flame in which there is an excess of oxygen. The unburned excess tends to oxidize the weld metal.

OXYACETYLENE CUTTING:

An oxygen cutting process in which the necessary cutting temperature is maintained by flames obtained frcm the combustion of acetylene with oxygen.

OXYACETYLENE WELDING:

A welding process in which the required temperature is attained by flames obtained from the combustion of acetylene with oxygen.

OXY-ARC CUTTING:

An oxygen cutting process in which the necessary cutting temperature is maintained by means of an arc between an electrode and the base metal.

OXY-CITY GAS CUTTING:

An oxygen cutting process in which the necessary cutting temperature is maintained by flames obtained from the combustion of city gas with oxygen.

OXYGEN CUTTING:

A process of cutting ferrous metals by means of the chemical action of oxygen on elements in the base metal at elevated temperatures.

OXYGEN GOUGING:

An application of oxygen cutting in which a chamfer or groove is formed.

OXY-HYDROGEN CUTTING:

An oxygen cuting process in which the necessary cutting temperature is maintained by flames obtained from the combustion of city gas with oxygen.

OXY-HYDROGEN WELDING:

A gas welding process in which the required welding temperature is attained by flames obtained from the combustion of hydrogen with oxygen.

OXY-NATURAL GAS CUTTING:

An oxygen cutting process in which the necessary cutting temperature is maintained by flames obtained by the combustion of natural gas with oxygen.

OXY-PROPANE CUTTING:

An oxygen cutting process in which the necessary cutting temperature is maintained by flames obtained from the combustion of propane with oxygen.

P
PASS:

The weld metal deposited in one general progression along the axis of the weld.

PEENING:

The mechanical working of metals by means of hammer blows. Peening tends to stretch the surface of the cold metal, thereby relieving contraction stresses.

PENETRANT INSPECTION:

a. Fluorescent.  A water washable penetrant with high fluorescence and low surface tension.  It is drawn into small surface openings by capillary action. When exposed to black light, the dye will fluoresce.
b. Dye. A process which involves the use of three noncorrosive liquids. First, the surface cleaner solution is used. Then the penetrant is applied and allowed to stand at least 5 minutes.  After standing, the penetrant is removed with the leaner solution and the developer is applied.  The dye penetrant, which has remained in the surface discontinuity, will be drawn to the surface by the developer resulting in bright red indications.
PERCUSSIVE WELDING:

A resistance welding process in which a discharge of electrical energy and the application of high pressure occurs simultaneously, or with the electrical discharge occurring slightly before the application of pressure.

PERLITE:

Perlite is the lamellar aggregate of ferrite and iron carbide resulting from the direct transformation of austenite at the lower critical point.

PITCH:

Center to center spacing of welds.

PLUG WELD:

A weld is made in a hole in one member of a lap joint, joining that member to that portion of the surface of the other member which is exposed through the hole.  The walls of the hole may or may not be parallel, and the hole may be partially or completely filled with the weld metal.

POKE WELDING:

A spot weldimg process in which pressure is applied manually to one electrode. The other electrode is clamped to any part of the metal much in the same manner that arc welding is grounded.

POROSITY:

The presence of gas pockets or inclusions in welding.

POSITIONS OF WELDING:

All welding is accomplished in one of four positions: flat, horizontal, overhead, and vertical.  The limiting angles of the various positions depend somewhat as to whether the weld is a fillet or groove weld.

POSTHEATING:

The appplication of heat to an assembly after a welding, brazing, soldering, thermal spraying, or cutting operation.

POSTWELD INTERVAL:

In resistance welding, the heat time between the end of weld time, or weld interval, and the start of hold time. During this interval, the weld is subjected to mechanical and heat treatment.

PREHEATING:

The application of heat to a base metal prior to a welding or cutting operation.

PRESSURE CONTROLLED WELDING:

The making of a number of spot or projection welds in which several electrodes function progressively under the control of a pressure sequencing device.

PRESSURE WELDING:

Any welding process or method in which pressure is used to complete the weld.

PREWELD INTERVAL:

In spot, projection, and upset welding, the time between the end of squeeze time and the start of weld time or weld interval during which the material is preheated.  In flash welding, it is the time during which the material is preheated.

PROCEDURE QUALIFICATION:

The demonstration that welds made by a specific procedure can meet prescribed standards.

PROJECTION WELDING:

A resistance welding process between two or more surfaces or between the ends of one member and the surface of another. The welds are localized at predetermined points or projections.

PULSATION WELDING:

A spot, projection, or seam welding process in which the welding current is interrupted one or more times without the release of pressure or change of location of electrodes.

PUSH WELDING:

The making of a spot or projection weld in which the force is aping current is interrupted one or more times without the release of pressure or change of location of electrodes.

PUSH WELDING:

The making of a spot or projection weld in which the force is applied manually to one electrode and the work or a backing bar takes the place of the other electrode.

Q
QUENCHING:

The sudden cooling of heated metal with oil, water, or compressed air.

R
REACTION STRESS:

The residual stress which could not otherwise exist if the members or parts being welded were isolated as free bodies without connection to other parts of the structure.

REDUCING FLAME:

See CARBURIZING FLAME.

REGULATOR:

A device used to reduce cylinder pressure to a suitable torch working pressure.

REINFORCED WELD:

The weld metal built up above the surface of the two abutting sheets or plates in excess of that required for the size of the weld specified.

RESIDUAL STRESS:

Stress remaining in a structure or member as a result of thermal and/or mechanical treatment.

RESISITANCE BRAZING:

A brazing process in which bonding is produced by the heat obtained from resistance to the flow of electric current in a circuit of which the workpiece is a part, and by using a nonferrous filler metal having a melting point above 800 °F (427 °C), but below that of the base metals. The filler metal is distributed in the joint by capillary  attraction.

RESISTANCE BUTT WELDING:

A group of resistance welding processes in which the weld occurs simultaneously over the entire contact area of the parts being joined.

RESISTANCE WELDING:

A group of welding processes in which fusion is produced by heat obtained from resistance to the flow of electric current in a circuit of which the workpiece is a part and by the application of pressure.

REVERSE POLARITY:

The arrangement of direct current arc welding leads in which the work is the negative pole and the electrode is the positive pole of the welding arc.

ROCKWELL HARDNESS TEST:

In this test a machine measures hardness by determining the depth of penetration of a penetrator into the specimen under certain arbitrary fixed conditions of test.  The penetrator may be either a steel ball or a diamond spherocone.

ROOT:

See ROOT OF JOINT and ROOT OF WELD.

ROOT CRACK:

A crack in the weld or base metal which occurs at the root of a weld.

ROOT EDGE:

The edge of a part to be welded which is adjacent to the root.

ROOT FACE:

The portion of the prepared edge of a member to be joined by a groove weld which is not beveled or grooved.

ROOT OF JOINT:

That portion of a joint to be welded where the members approach closest to each other.  In cross section, the root of a joint may be a point, a line, or an area.

ROOT OF WELD:

The points, as shown in cross section, at which the bottom of the weld intersects the base metal surfaces.

ROOT OPENING:

The separation between the members to be joined at the root of the joint.

ROOT PENETRATION:

The depth a groove weld extends into the root of a joint measured on the centerline of the root cross section.

S
SCARF:

The chamfered surface of a joint.

SCARFING:

A process for removing defects and checks which develop in the rolling of steel billets by the use of a low velocity oxygen deseaming torch.

SEAL WELD:

A weld used primarily to obtain tightness and to prevent leakage.

SEAM WELDING:

Welding a lengthwise seam in sheet metal either by abutting or overlapping joints.

SELECTIVE BLOCK SEQUENCE:

A block sequence in which successive blocks are completed in a certain order selected to create a predetermined stress pattern.

SERIES WELDING:

A resistance welding process in which two or more welds are made simultaneously by a single welding transformer with the total current passing through each weld.

SHEET SEPARATION:

In spot, seam, and projection welding, the gap surrounding the weld between faying surfaces, after the joint has been welded.

SHIELDED WELDING:

An arc welding process in which protection from the atmosphere is obtained through use of a flux, decomposition of the electrode covering, or an inert gas.

SHOULDER:

See ROOT FACE.

SHRINKAGE STRESS:

See RESIDUAL STRESS.

SINGLE IMPULSE WELDING:

The making of spot, projection, and upset welds by a single impulse of current.  When alternating current is used, an impulse may consist of a fraction of a cycle or a number of cycles.

SIZE OF WELD:

a. Groove weld.  The joint penetration (depth of chamfering plus the root penetrtion when specified).
b. Equal leg fillet welds.  The leg length of the largest isosceles right triangle which can be inscribed within the fillet weld cross section.
c. Unequal leg fillet welds.  The leg length of the largest right triangle which can be inscribed within the fillet weld cross section.
d. Flange weld. The weld metal thickness measured at the root of the weld.

SKIP SEQUENCE:

See WANDERING SEQUENCE.

SLAG INCLUSION:

Non-metallic solid material entrapped in the weld metal or between the weld metal and the base metal.

SLOT WELD:

A weld made in an elongated hole in one member of a lap or tee joint joining that member to that portion of the surface of the other member which is exposed through the hole. The hole may be open at one end and may be partially or completely filled with weld metal. (A fillet welded slot should not be construed as conforming to this definition.)

SLUGGING:

Adding a separate piece or pieces of material in a joint before or during welding with a resultant welded joint that does not comply with design drawing or specification requirements.

SOLDERING:

A group of welding processes which produce coalescence of materials by heating them to suitable temperature and by using a filler metal having a liquidus not exceeding 450 °C (842 °F) and below the solidus of the base materials.  The filler metal is distributed between the closely fitted surfaces of the joint by capillary action.

SOLIDUS:

The highest temperature at which a metal or alloy is completely solid.

SPACER STRIP:

A metal strip or bar inserted in the root of a joint prepared for a groove weld to serve as a backing and to maintain the root opening during welding.

SPALL:

Small chips or fragments which are sometimes given off by electrodes during the welding operation.  This problem is especially common with heavy coated electrodes.

SPATTER:

The metal particles expelled during arc and gas welding which do not form a part of the weld.

SPOT WELDING:

A resistance welding process in which fusion is produced by the heat obtained from the resistance to the flow of electric current through the workpieces held together under pressure by electrodes. The size and shape of the individually formed welds are limited by the size and contour of the electrodes.

SPRAY TRANSFER:

A type of metal transfer in which molten filler metal is propelled axially across the arc in small droplets.

STAGGERED INTERMITTENT FILLET WELD:

Two lines of intermittent welding on a joint, such as a tee joint, wherein the fillet increments in one line are staggered with respect to those in the other line.

STORED ENERGY WELDING:

The making of a weld with electrical energy accumulated electrostatically, electronagnetically, or electrochemically at a relatively low rate and made available at the required welding rate.

STRAIGHT POLARITY:

The arrangement of direct current arc welding leads in which the work is the positive pole and the electrode is the negative pole of the welding arc.


STRESS RELIEVING:
A process of reducing internal residual stresses in a metal object by heating to a suitable temperature and holding for a proper time at that temperature.  This treatment may he applied to relieve stresses induced by casting, quenching, normaliz/fig, machining, cold working, or welding.

STRING BEAD WELDING:

A method of metal arc welding on pieces 3/4 in. (19 mm) thick or heavier in which the weld metal is deposited in layers composed of strings of beads applied directly to the face of the bevel.

STUD WELDING:

An arc welding process in which fusion is produced by heating with an electric arc drawn between a metal stud, or similar part, and the other workpiece, until the surfaces to be joined are properly heated. They are brought together under pressure.


SUBMERGED ARC WELDING:
An arc welding process in which fusion is produced by heating with an electric arc or arcs between a bare metal electrode or electrodes and the work.  The welding is shieldd by a blanket of granular, fusible material on the work.  Pressure is not used.  Filler metal is obtained from the electrode, and sometimes from a supplementary welding rod.
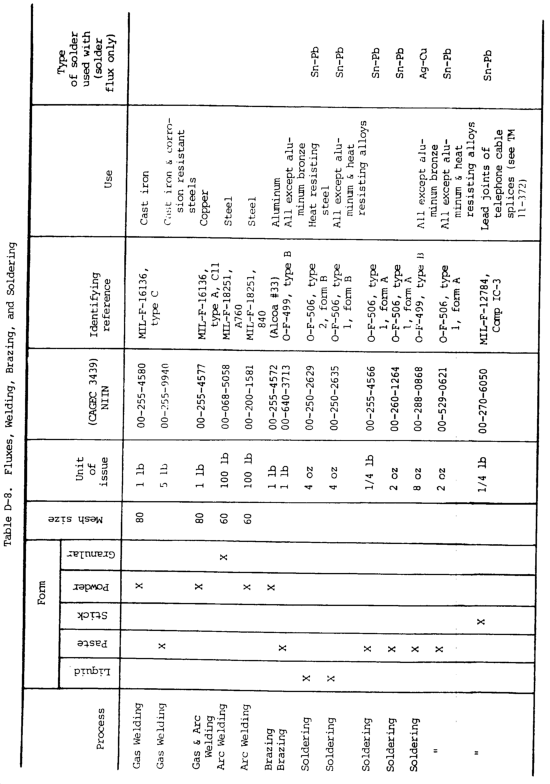
SURFACING:

The deposition of filler metal on a metal surface to obtain desired properties or dimensions.

T
TACK WELD:

A weld made to hold parts of a weldment in proper alignment until the final welds are made.

TEE JOINT:

A joint between two members located approximately at right angles to each other in the form of a T.

TEMPER COLORS:

The colors which appear on the surface of steel heated at low temperature in an oxidizing atmosphere.

TEMPER TIME:

In resistance welding, that part of the postweld interval during which a current suitable for tempering or heat treatment flows. The current can be single or multiple impulse, with varying heat and cool intervals.

TEMPERING:

Reheating hardened steel to some temperature below the lower critical temperature, followed by a desired rate of cooling. The object of tempering a steel that has been hardened by quenching is to release stresses set up, to restore some of its ductility, and to develop toughness through the regulation or readjustment of the embrittled structural constituents of the metal. The temperature conditions for tempering may be selected for a given composition of steel to obtain almost any desired combination of properties.

TENSILE STRENGTH:

The maximum load per unit of original cross-sectional area sustained by a material during the tension test.

TENSION TEST:

A test in which a specimen is broken by applying an increasing load to the two ends.  During the test, the elastic properties and the ultimate tensile strength of the material are determined.  After rupture, the broken specimen may be measured for elongation and reduction of area.

THERMIT CRUCIBLE

The vessel in which the thermit reaction takes place.

THERMIT MIXTURE:

A mixture of metal oxide and finely divided aluminum with the addition of alloying metals as required.

THERMIT MOLD:

A mold formed around the parts to be welded to receive the molten metal.

THERMIT REACTION:

The chemical reaction between metal oxide and aluminum which produces superheated molten metal and aluminum oxide slag.

THERMIT WELDING:

A group of welding processes in which fusion is produced by heating with superheated liquid metal and slag resulting from a chemical reaction between a metal oxide and aluminum, with or without the application of pressure. Filler metal, when used, is obtained from the liquid metal.

THROAT DEPTH:

In a resistance welding machine, the distance from the centerline of the electrodes or platens to the nearest point of interference for flatwork or sheets.  In a seam welding machine with a universal head, the throat depth is measured with the machine arranged for transverse welding.

THROAT OF FILLET WELD:

a. Theoretical.  The distance from the beginning of the root of the joint perpendicular to the hypotenuse of the largest right triangle that can be inscribed within the fillet-weld cross section.
b. Actual.  The distance from the root of the fillet weld to the center of its face.

TOE CRACK:

A crack in the base metal occurring at the toe of the weld.

TOE OF THE WELD:

The junction between the face of the weld and the base metal.

TORCH:

See CUTTING TORCH or WELDING TORCH.

TORCH BRAZING:

A brazing process in which bonding is produced by heating with a gas flame and by using a nonferrous filler metal having a melting point above 800 °F (427 °C), but below that of the base metal. The filler metal is distributed in the joint of capillary attraction.

TRANSVERSE SEAM WELDING:

The making of a seam weld in a direction essentially at right angles to the throat depth of a seam welding machine.

TUNGSTEN ELECTRODE:

A non-filler metal electrode used in arc welding or cutting, made principally of tungsten.

U
UNDERBEAD CRACK:

A crack in the heat affected zone not extending to the surface of the base metal.

UNDERCUT:

A groove melted into the base metal adjacent to the toe or root of a weld and left unfilled by weld metal.

UNDERCUTTING:

An undesirable crater at the edge of the weld caused by poor weaving technique or excessive welding speed.

UPSET:

A localized increase in volume in the region of a weld, resulting from the application of pressure.

UPSET WELDING:

A resistance welding process in which fusion is produced simultaneously over the entire area of abutting surfaces, or progressively along a joint, by the heat obtained from resistance to the flow of electric current through the area of contact of those surfaces.  Pressure is applied before heating is started and is maintained throughout the heating period.

UPSETTING FORCE:

The force exerted at the welding surfaces in flash or upset welding.

V
VERTICAL POSITION:

The position of welding in which the axis of the weld is approximately vertical.  In pipe welding, the pipe is in a vertical position and the welding is done in a horizontal position.

W
WANDERING BLOCK SEQUENCE:

A block welding sequence in which successive weld blocks are completed at random after several starting blocks have been completed.

WANDERING SEQUENCE:

A longitudinal sequence in which the weld bead increments are deposited at random.

WAX PATTERN:

Wax molded around the parts to be welded by a thermit welding process to the form desired for the completed weld.

WEAVE BEAD:

A type of weld bead made with transverse oscillation.

WEAVING:

A technique of depositing weld metal in which the electrode is oscillated.  It is usually accomplished by a semicircular motion of the arc to the right and left of the direction of welding.  Weaving serves to increase the width of the deposit, decreases overlap, and assists in slag formation.

WELD:

A localized fusion of metals produced by heating to suitable temperatures. Pressure and/or filler metal may or may not be used. The filler mkal has a melting point approximately the same or below that of the base mtals, but always above 800 °F (427 °C).

WELD BEAD:

A weld deposit resulting from a pass.

WELD GAUGE:

A device designed for checking the shape and size of welds.

WELD METAL:

That portion of a weld that has been melted during welding.

WELD SYMBOL:

A picture used to indicate the desired type of weld.

WELDABILITY:

The capacity of a material to form a strong bond of adherence under pressure or when solidifying from a liquid.

WELDER CERTIFICATION:

Certification in writing that a welder has produced welds meeting prescribed standards.

WELDER PERFROMANCE QUALIFICATION:

The demonstration of a welder’s ability to produce welds meeting prescribed standards.

WELDING LEADS:

a. Electrode lead. The electrical conductor between the source of the arc welding current and the electrode holder.
b. Work lead. The electrical conductor between the source of the arc welding current and the workpiece.

WELDING PRESSURE:

The pressure exerted during the welding operation on the parts being welded.

WELDING PROCEDURE:

The detailed methods and practices including all joint welding procedures involved in the production of a weldment.

WELDING ROD:

Filler metal in wire or rod form, used in gas welding and brazing processes and in those arc welding processes in which the electrode does not provide the filler metal.

WELDING SYMBOL:

The assembled symbol consists of the following eight elements, or such of these as are necessary:  reference line, arrow, basic weld symbols, dimension and other data, supplementary symbols, finish symbols, tail, specification, process, or other references.

WELDING TECHNIQUE:

The details of a manual, machine, or semiautomatic welding operation which, within the limitations of the prescribed joint welding procedure, are controlled by the welder or welding operator.

WELDING TIP:

The tip of a gas torch especially adapted to welding.

WELDING TORCH:

A device used in gas welding and torch brazing for mixing and controlling the flow of gases.

WELDING TRANSFORMER:

A device for providing current of the desired voltage.

WELDMENT:

An assembly whose component parts are formed by welding.

WIRE FEED SPEED:

The rate of speed in mn/sec or in./min at which a filler metal is consumed in arc welding or thermal spraying.

WORK LEAD:

The electric conductor (cable) between the source of arc welding current and the workpiece.

X
X-RAY:

A radiographic test method used to detect internal defects in a weld.


Y
YIELD POINT:

The yield point is the load per unit area value at which a marked increase in deformation of the specimen occurs with little or no increase of load; in other words, the yield point is the stress at which a marked increase in strain occurs with little or no increase in stress.

List Of Illustrations

LIST OF ILLUSTRATIONS

Figure 2-1. Welding helmet and hand-held shield

Figure 2-2. Welding helmet and shields

Figure 2-3. Safety goggles

Figure 2-4. Protective clothing

Figure 2-5. Welding booth with mechanical ventilation

Figure 2-6. Process diagram for air carbon arc cutting

Figure 2-7. Circuit block diagram AAC

Figure 2-8. Safe way to weld container that held combustibles

Figure 3-1. Construction lines

Figure 3-2. Standard locations of elements of a welding symbol

Figure 3-3. Basic and supplementary arc and gas welding symbols

Figure 3-4. Process or specification references

Figure 3-5. Definite process reference

Figure 3-6. No process or specification reference

Figure 3-7. Weld-all-around and field weld symbols

Figure 3-8. Resistance spot and resistance seam welds

Figure 3-9. Arrow side fillet welding symbol

Figure 3-10. Other side fillet welding symbol

Figure 3-11. Plug and slot welding symbols indicating location and dimensions of the weld

Figure 3-12. Arrow side V groove welding symbol

Figure 3-13. Other side V groove welding symbol

Figure 3-14. Welds on the arrow side of the joint

Figure 3-15. Welds on the other side of the joint

Figure 3-16. Welds on both sides of joint

Figure 3-17. Spot, seam, and flash or upset weld symbols

Figure 3-18. Construction of symbols, perpendicular leg always to the left

Figure 3-19. Construction of symbols, arrow break toward chamfered member

Figure 3-20. Construction of symbols, symbols placed to read left to right

Figure 3-21. Combination of weld symbols

Figure 3-22. Complete penetration indication

Figure 3-23. Construction of symbols, special types of welds

Figure 3-24. Multiple reference lines

Figure 3-25. Supplementary data

Figure 3-26. Supplementary symbols

Figure 3-27. Dimensions of fillet welds

Figure 3-28. Combined intermittent and continuous welds

Figure 3-29. Extent of fillet welds

Figure 3-30. Dimensions of chain intermittent fillet welds

Figure 3-31. Dimensions of staggered intermittent fillet welds

Figure 3-32. Application of dimensions to intermittent fillet weld symbols

Figure 3-33. Surface contour of fillet welds

Figure 3-34. Plug and slot welding symbols indicating location and dimensions of the weld

Figure 3-35. Surface contour of plug welds and slot welds

Figure 3-36. Surface contour of plug welds and slot welds with user’s standard finish symbol

Figure 3-37. Slot weld dimensions

Figure 3-38. Dimensions of arc spot and arc seam welds

Figure 3-39. Extent of arc spot welding

Figure 3-40. Number of arc spot welds in a joint

Figure 3-41. Surface contour of arc spot and arc seam welds

Figure 3-42. Groove weld dimensions

Figure 3-43. Groove weld dimensions having no general note

Figure 3-44. Groove welds with differing dimensions

Figure 3-45. Groove weld dimensions for welds extending through the members joined

Figure 3-46. Groove weld dimensions for welds extending partly through the members joined

Figure 3-47. Dimensions of groove welds with specified root penetration

Figure 3-48. Flare groove welds

Figure 3-49. Root opening

Figure 3-50. Back or backing weld symbol

Figure 3-51. Surface contour of groove welds

Figure 3-52. Contours obtained by welding

Figure 3-53. Flush contour by machining

Figure 3-54. Convex contour by machining

Figure 3-55. Surface contour of back or backing welds

Figure 3-56. Melt-thru weld symbol

Figure 3-57. Surface contour of melt-thru welds

Figure 3-58. Size of surfaces built up by welding

Figure 3-59. Flange weld symbols

Figure 3-60. Size of resistance spot welds

Figure 3-61. Strength of resistance spot welds

Figure 3-62. Spacing of resistance spot welds

Figure 3-63. Extent of resistance spot weld

Figure 3-64. Number of resistance spot welds

Figure 3-65. Contour of resistance spot welds

Figure 3-66. Size of resistance seam welds

Figure 3-67. Strength of resistance seam welds

Figure 3-68. Length of resistance seam welds

Figure 3-69. Extent of resistance seam welds

Figure 3-70. Dimensioning of intermittent resistance seam welds

Figure 3-71. Contour of resistance seam welds

Figure 3-72. Embossment on arrow-side member of joint for projection welding

Figure 3-73. Embossment on other-side member of joint for projection welding

Figure 3-74. Diameter of projection welds

Figure 3-75. Strength of projection welds

Figure 3-76. Spacing of projection welds

Figure 3-77. Number of projection welds

Figure 3-78. Extent of projection welds

Figure 3-79. Contour of projection welds

Figure 3-80. Surface contour of lash or upset welds

Figure 4-1. The five basic types of joints

Figure 4-2. Inaccessible welds

Figure 5-1. Stationary oxygen cylinder manifold and other equipment

Figure 5-2. Station outlet for oxygen or acetylene

Figure 5-3. Stationary acetylene cylinder manifold and other equipment

Figure 5-4. Acetylene generator and operating equipment

Figure 5-5. Portable oxyacetylene welding and cutting equipment

Figure 5-6. Acetylene cylinder construction

Figure 5-7. Oxygen cylinder construction

Figure 5-8. Single stage oxygen regulator

Figure 5-9. Two stage oxygen regulator

Figure 5-10. Mixing head for injector type welding torch

Figure 5-11. Equal pressure type general purpose welding torch

Figure 5-12. Oxyacetylene cutting torch

Figure 5-13. Diagram of oxyacetylene cutting tip

Figure 5-14. Cutting attachment for welding torch

Figure 5-15. Making a bevel on a circular path with a cutting machine

Figure 5-16. Machine for making four oxyacetylene cuts simultaneously

Figure 5-17. Cutaway view of DC welding generator

Figure 5-18. Direct current welding machine

Figure 5-19. Alternating current arc welding machine

Figure 5-20. Gas tungsten-arc welding setup

Figure 5-21. Argon regulator with flowmeter

Figure 5-22. TIG welding torch

Figure 5-23. MIG welding torch

Figure 5-24. Connection diagram for MIG welding

Figure 5-25. Metal-arc welding electrode holders

Figure 5-26. Atomic hydrogen welding torch

Figure 5-27. Chipping hammer and wire brush

Figure 5-28. Welding table

Figure 5-29. Molten metal transfer with a bare electrode

Figure 5-30. Arc action obtained with a light coated electrode

Figure 5-31. Arc action obtained with a shielded arc electrode

Figure 5-32. Electrode drying ovens

Figure 5-33. Correct electrode taper

Figure 5-34. Polarity of welding current

Figure 5-35. Effect of polarity on weld shape

Figure 5-36. AC wave

Figure 5-37. Rectified ac wave

Figure 5-38. Comparison of penetration contours

Figure 5-39. Resistance spot welding machine and accessories

Figure 5-40. Projection welding

Figure 5-41. Thermit welding crucible and mold

Figure 5-42. Portable forge

Figure 5-43. Blacksmith’s anvil

Figure 6-1. Chart of welding processes

Figure 6-2. Equipment setup for arc stud welding

Figure 6-3. Equipment setup for gas shielded arc stud welding

Figure 6-4. Submerged arc welding process

Figure 6-5. Gas tungsten arc welding

Figure 6-6. Gas metal arc welding

Figure 6-7. Shielded metal arc welding

Figure 6-8. Furnace brazing operation

Figure 6-9. Typical induction brazing coils and joints

Figure 6-10. Chemical bath dip brazing

Figure 6-11. Infrared brazing apparatus

Figure 6-12. Steps in making a thermit weld

Figure 6-13. Nomenclature of welds

Figure 6-14. Heat affected zones in a multipass weld

Figure 6-15. Welding prodedure schedule – various welds

Figure 6-16. Basic joint types

Figure 6-17. Butt joints in light sections

Figure 6-18. Butt joints in heavy sections

Figure 6-19. Corner joints for sheets and plates

Figure 6-20. Edge joints for light sheets and plates

Figure 6-21. Lap joints

Figure 6-22. Tee joint-single pass fillet weld

Figure 6-23. Edge preparation for tee joints

Figure 6-24. Applications of fillet welds – single and double

Figure 6-25. Basic groove welds

Figure 6-26. Typical weld joints

Figure 6-27. Types of groove welds

Figure 6-28. Surfacing, plug, and slot welds

Figure 6-29. Flash, seam, spot, and upset welds

Figure 6-30. Welding positions – groove welds – plate

Figure 6-31. Welding positions – fillet welds – plate

Figure 6-32. Welding positions – pipe welds

Figure 6-33. Diagram of tack welded pipe on rollers

Figure 6-34. Diagram of horizontal pipe weld with uphand method

Figure 6-35. Diagram of horizontal pipe weld with downhand method

Figure 6-36. Vertical pipe fixed position weld with backhand method

Figure 6-37. Deposition of root, filler, and finish weld beads

Figure 6-38. Work angle – fillet and groove weld

Figure 6-39. Travel angle – fillet and groove weld

Figure 6-40. Forehand welding

Figure 6-41. Backhand welding

Figure 6-42. Results of weld metal shrinkage

Figure 6-43. Methods of counteracting contractions

Figure 6-44. Quench plates used in the welding of sheet metal

Figure 6-45. Fixture used in the welding of sheet metal

Figure 6-46. Controlling expansion and contraction of castings by preheating

Figure 6-47. Cube of metal showing expansion

Figure 6-48. Longitudinal (L) and transverse (T) shrinkage stresses in a butt weld

Figure 6-49. Longitudinal (L) and transverse (T) shrinkage stresses in a fillet weld

Figure 6-50. Distortion in a butt weld

Figure 6-51. Distortion in a fillet weld

Figure 6-52. The order in which to make weld joints

Figure 6-53. Edge welded joint – residual stress pattern

Figure 6-54. Butt welded joint – residual stress pattern

Figure 6-55. Ductile fracture surface

Figure 6-56. Brittle fracture surface

Figure 6-57. Fatigue fracture surface

Figure 6-58. Corner joint

Figure 6-59. Tee joint

Figure 6-60. Redesigned corner joint to avoid lamellar tearing

Figure 6-61. Effect of ground location on magnetic arc below

Figure 6-62. Unbalanced magnetic force due to current direction change

Figure 6-63. Unbalanced magnetic force due to unbalanced magnetic path

Figure 6-64. Reduction of magnetic force to induced fields

Figure 7-1. Tensile strength

Figure 7-2. Shear strength

Figure 7-3. Compressive strength

Figure 7-4. Characteristics of sparks generated by the grinding of metals

Figure 7-5. Blast furnace

Figure 7-6. Conversion of iron ore into cast iron, wrought iron, and steel

Figure 7-7. How steel qualities change as carbon is added

Figure 7-8. Weld preparation

Figure 7-9. Heat input nomograph

Figure 7-10. Studding method for cast iron repair

Figure 7-11. Joint design for aluminum plates

Figure 7-12. Aluminum joint designs for gas metal-arc welding processes

Figure 7-13. Joint preparation for arc welding magnesium

Figure 7-14. Position of torch and welding rod

Figure 7-15. Minimizing cracking during welding

Figure 7-16. Baffle arrangements to improve shielding

Figure 7-17. Trailing shield

Figure 7-18. Backing fixtures for butt welding heavy plate and thin sheet

Figure 7-19. Use of weld backup tape

Figure 8-1. Transfer of metal across the arc of a bare electrode

Figure 8-2. Deposition rates of steel flux-cored electrodes

Figure 8-3. Correct electrode taper

Figure 10-1. Characteristic curve for welding power source

Figure 10-2. Curve for single control welding machine

Figure 10-3. Curve for dual control welding machines

Figure 10-4. Volt ampere slope vs welding operation

Figure 10-5. Volt ampere curve for true constant current machine

Figure 10-6. Pulsed current welding

Figure 10-7. Burn-off rates of wire vs current

Figure 10-8. Static volt amp characteristic curve of CV machine

Figure 10-9. Static volt amp curve with arc range

Figure 10-10. Various slopes of characteristic curves

Figure 10-11. Current density – various electrode signs

Figure 10-12. Electrical circuit

Figure 10-13. Welding electrical circuit

Figure 10-14. Arc characteristic volt amp curve

Figure 10-15. The dc tungsten arc

Figure 10-16. Arc length vs voltage and heat

Figure 10-17. The dc shielded metal arc

Figure 10-18. The dc consumable electrode metal arc

Figure 10-19. Sine wave generation

Figure 10-20. Sequences in multilayer welding

Figure 10-21. Schematic drawing of SMAW equipment

Figure 10-22. Elements of a typical welding circuit for shielded metal arc welding

Figure 10-23. Three types of free-flight metal transfer in a welding arc

Figure 10-24. Travel speed limits for current levels used for 1/8-inch-diameter E6010 SMAW electrode.  Dashed lines show travel speed limits as determined by amount of undercut and bead shape

Figure 10-25. Travel speed limits for current levels used for 1/8-inch-diameter E6011 SMAW electrode. Dashed lines show travel speed limits as determined by amount of undercut and bead shape

Figure 10-26. Travel speed limits for current levels used for 1/8-inch-diameter E6013 SMAW electrode.  Dashed lines show travel speed limits as determined by amount of undercut and bead shape

Figure 10-27. Travel speed limits for current levels used for 1/8-inch-diameter E7018 SMAW electrode.  Dashed lines show travel speed limits as determined by amount of undercut and bead shape

Figure 10-28. Travel speed limits for current levels used for 1/8-inch-diameter E7024 SMAW electrode.  Dashed lines show travel speed limits as determined by amount of undercut and bead shape

Figure 10-29. Travel speed limits for current levels used for 1/8-inch-diameter E8018 SMAW electrode.  Dashed lines show travel speed limits as determined by amount of undercut and bead shape

Figure 10-30. Travel speed limits for current levels used for 1/8-inch-diameter E11018 SMAW electrode. Dashed lines show travel speed limits as determined by amount of undercut and bead shape

Figure 10-31. Shielded metal arc welding

Figure 10-32. Gas tungsten arc (TIG) welding (GTAW)

Figure 10-33. Gas tungsten arc welding equipment arrangement

Figure 10-34. Technique for manual gas tungsten arc (TIG) welding

Figure 10-35. Process diagram – keyhole mode – PAW

Figure 10-36. Cross section of plasma arc torch head

Figure 10-37. Transferred and nontransferred plasma arcs

Figure 10-38. Various joints for plasma arc

Figure 10-39. Circuit diagram – PAW

Figure 10-40. Quality and common faults

Figure 10-41. Deposition rates

Figure 10-42. Typical air cooled carbon electrode holders

Figure 10-43. Process diagram – CAW

Figure 10-44. Gas metal arc welding process

Figure 10-45. MIG welding process

Figure 10-46. Typical semiautomatic gas-cooled, curved-neck gas metal arc welding gun

Figure 10-47. Variation in volumes and transfer rate of drops with welding current (steel electrode)

Figure 10-48. Voltage versus current for E70S-2 1/16-inch-diameter electrode and shield gas of argon with 2-percent oxygen addition

Figure 10-49. Voltage versus current for E70S-2 1/16-inch-diameter electrode and carbon dioxide shield gas

Figure 10-50. Voltage versus current for E70S-3 1/16-inch-diameter electrode and shield gas of argon with 2-percent oxygen addition

Figure 10-51. Voltage versus current for E70S-3 1/16-inch-diameter electrode and carbon dioxide shield gas

Figure 10-52. Voltage versus current for E70S-4 1/16-inch-diameter electrode and carbon dioxide shield gas

Figure 10-53. Voltage versus current for E70S-6 1/16-inch-diameter electrode and carbon dioxide shield gas

Figure 10-54. Voltage versus current for E110S 1/16-inch-diameter electrode and shield gas of argon with 2-percent oxygen addition

Figure 10-55. Flux-cored arc welding process

Figure 10-56. Equipment for flux-cored arc welding

Figure 10-57. Wire feed assembly

Figure 10-58. Cross-section of a flux-cored wire

Figure 10-59. Block diagram – SAW

Figure 10-60. Process diagram – submerged arc welding

Figure 10-61. Weld joint designs for submerged arc welding

Figure 10-62. Deposition rates for singel electrodes

Figure 10-63. Welds corresponding to table 10-23

Figure 10-64. Stickout vs deposition rate

Figure 10-65. Welding on rotating circular parts

Figure 10-66. Angle of slope of work vs weld

Figure 10-67. Angle of electrode vs weld

Figure 10-68. Two electrode wire systems

Figure 10-69. Strip electrode on surfacing

Figure 10-70. Welding with iron powder additives

Figure 10-71. Plasma arc torch terminology

Figure 10-72. Basic plasma arc cutting circuitry

Figure 10-73. Dual flow plasma arc cutting

Figure 10-74. Water injection plasma arc cutting arrangement

Figure 10-75. Process diagram for air carbon arc cutting

Figure 10-76. Air carbon arc cutting diagram

Figure 10-77. Resistance spot welding process

Figure 10-78. Flash welding

Figure 10-79. Friction welding process

Figure 10-80. Electron beam welding process

Figure 11-1. The temperature of the flame

Figure 11-2. Oxyacetylene flames

Figure 11-3. What MAPP gas flames should look like

Figure 11-4. Forehand welding

Figure 11-5. Backhand welding

Figure 11-6. The fillet used to make the five basic joints

Figure 11-7. Fillet weld throat dimension

Figure 11-8. Fillet weld size vs strength

Figure 11-9. Welding position – fillet and groove welds

Figure 11-10. Welding a butt joint in the horizontal position

Figure 11-11. Bead welding without a welding rod

Figure 11-12. Bead welding with a welding rod

Figure 11-13. Position of rod and torch for a butt weld in a flat position

Figure 11-14. Welding a butt joint in the vertical position

Figure 11-15. Welding a butt joint in the overhead position

Figure 11-16. Silver brazing joints

Figure 11-17. Starting a cut and cutting with a cutting torch

Figure 11-18. Procedure for oxyacetylene cutting of cast iron

Figure 11-19. Coupling distance

Figure 11-20. Torch angle

Figure 12-1. Arrangements for underwater welding

Figure 12-2. The wire metallizing process

Figure 12-3. Electric arc spraying process

Figure 12-4. Flame spray process

Figure 12-5. Plasma spray process

Figure 12-6. Process diagram of oxygen cutting

Figure 12-7. Manual oxygen cutting torch

Figure 12-8. Methods of preparing joints

Figure 12-9. Procedure for oxyacetylene cutting of cast iron

Figure 12-10. Operations and time intervals in flame descaling prior to painting

Figure 12-11. Removal of countersunk rivets

Figure 12-12. Removal of buttonhead rivets

Figure 12-13. Method of cutting stainless steel welds

Figure 12-14. Method of removing surface defects from stainless steel welds

Figure 12-15. Preparation for welding cracks in homogenous armor plate

Figure 12-16. Backing methods for depositing weld beads at the root of a double V joint

Figure 12-17. Sequence of passes when depositing weld beads on homogenous armor plate

Figure 12-18. Common defects when welding root beads on homogenous armor plate and the remedial procedures

Figure 12-19. Procedure for welding single V joint on homogenous armor plate

Figure 12-20. Double V weld on homogenous armor plate

Figure 12-21. Butt strap welds on cracked armor plate

Figure 12-22. Emergency repair of shell penetration through armor

Figure 12-23. Double V plug welding procedure for repairing shell penetration in homogenous armor plate

Figure 12-24. Correct and incorrect plug weld preparation for repairing shell penetration in homogenous armor plate

Figure 12-25. Welding homogenous armor without welding butt strap

Figure 12-26. Welding repair of gouges in surface of homogenous armor plate

Figure 12-27. Welding joint data for butt welds on face hardened armor

Figure 12-28. Use of butt strap on face hardened armor to repair cracks or gaps

Figure 12-29. Butt strap weld on face hardened armor

Figure 12-30. Weld joint data for corner welds on face hardened armor plate

Figure 12-31. Procedure for welding face hardened armor over 1/2 in. thick, using the double V joint method

Figure 12-32. Procedure for welding face hardened armor up to 1/2 in., using the depressed joint method

Figure 12-33. Seal bead weld

Figure 12-34. Angle iron serving as jig for small diameter pipe

Figure 12-35. Types of backing rings

Figure 12-36. Template pattern, ell joint, first step

Figure 12-37. Template pattern, ell joint, second step

Figure 12-38. Template pattern, ell joint, third step

Figure 12-39. Tee joint

Figure 12-40. Template pattern, tee joint, first step

Figure 12-41. Template pattern, tee joint, second step

Figure 12-42. Diagram of tack welded pipe on rollers

Figure 12-43. Diagram of horizontal pipe weld with uphand method

Figure 12-44. Diagram of horizontal pipe weld with downhand method

Figure 12-45. Vertical pipe fixed position weld with backhand method

Figure 12-46. Deposition of root, filler, and finish weld beads

Figure 12-47. Studding method for cast iron repair

Figure 12-48. Forge welds

Figure 12-49. Muffle jacket

Figure 12-50. Schematic diagram of resistance spot welder

Figure 12-51. Schematic diagram of upset and flash welder

Figure 13-1. Guided bend test jig

Figure 13-2. Guided bend test specimens

Figure 13-3. Guided bend and tensile strength test specimens

Figure 13-4. Free bend test of welded metal

Figure 13-5. Nick break test

Figure 13-6. Tensile strength test specimen and test method

Figure 13-7. Portable tensile strength and bend testing machine

Figure 13-8. Internal weld defects disclosed by X-ray inspection

Figure C-1. Distortion

Figure C-2. Warping

Figure C-3. Poor appearance

Figure C-4. Stress cracking

Figure C-5. Poor penetration

Figure C-6. Porous weld

Figure C-7. Poor fusion

List Of Tables

LIST OF TABLES

Table 2-1. Lens Shades for Welding and Cutting

Table 2-2. Required Exhaust Ventilation

Table 3-1. Designation of Welding Process by Letters

Table 3-2. Designation of Cutting Processes by Letters

Table 4-1. Welds Applicable to the Basic Joint Combinations

Table 5-1. Low Pressure or Injector Type Torch

Table 5-2. Balanced Pressure Type Torch

Table 5-3. Oxyacetylene Cutting Information

Table 5-4. Coating, Current, and Polarity Types Designated by the Fourth Digit in the Electrode Classification Number

Table 6-1. Preheating Temperatures

Table 7-1. Physical Properties of Metals

Table 7-2. Mechanical Properties of Metals

Table 7-3. Hardness Conversion Table

Table 7-4. Summary of Identification Tests of Metals

Table 7-5. Summary of Spark Test

Table 7-6. Approximate Hardness of Steel by the File Test

Table 7-7. Carbon Content of Cast Iron and Steel

Table 7-8. Standard Steel and Steel Alloy Number Designations

Table 7-9. AISI-SAE Numerical Designation of Carbon and Alloy Steels

Table 7-10. Standard Aluminum and Aluminum Alloy Number Designations

Table 7-11. Letters Used to Identify Alloying Elements in Magnesium Alloys

Table 7-12. Composition of Magnesium Alloys

Table 7-13. Copper and Copper Alloy Designation System

Table 7-14. Electrode Numbers

Table 7-15. Electrodes in the Army Supply System

Table 7-16. Suggested Preheat Temperatures

Table 7-17. Maximum Heat Inputs for T1 Steel

Table 7-18. Maximum Heat Inputs for T1 Type A and Type B Steels

Table 7-19. Welding Processes and Filler Metals for Cast Iron

Table 7-20. Designation of Aluminum Alloy Groups

Table 7-21. Welding Procedure Schedules for Gas Metal-Arc Welding (GMAW) of Aluminum (MIG Welding)

Table 7-22. Welding Procedure Schedules for AC-GTAW Welding of Aluminum (TIG Welding)

Table 7-23. Welding Procedure Schedules for DC-GTAW Welding of Aluminum (TIG) Welding

Table 7-24. Magnesium Weld Data

Table 7-25. Magnesium Stress Relief Data

Table 7-26. Welding Procedure Schedule for Gas Tungsten Arc Welding (GTAW) of Magnesium (TIG Welding)

Table 7-27. Welding Procedure Schedules for Gas Metal Arc Welding (GMAW) of Magnesium (MIG Welding)

Table 7-28. Welding Procedure Schedule for Metal-Arc Welding (GMAW) of Titanium (MIG Welding)

Table 7-29. Welding Procedure Schedules for Gas Tungsten Arc Welding (GTAW) Nickel Alloys (TIG Welding)

Table 7-30. Welding Procedure Schedules for Gas Metal Arc Welding (GMAW) Nickel Alloys (MIG Welding)

Table 8-1. Mild Steel Electrode Wire Composition for Submerged Arc Welding

Table 8-2. A.W.S. Filter Metal Specification and Welding Processes

Table 10-1. Established Voltage Limits

Table 10-2. Welding Position Capabilities

Table 10-3. Base Metals Weldable by the Plasma Arc Process

Table 10-4. Base Metal Thickness Range

Table 10-5. Weld Procedure Schedule – Plasma Arc Welding – Manual Application

Table 10-6. Method of Applying Carbon Arc Processes

Table 10-7. Welding Position Capabilities

Table 10-8. Welding Procedure Schedule – Galvanized Steel – Braze Welding

Table 10-9. Welding Procedure Schedule for Carbon Arc Welding Copper

Table 10-10. Welding Current for Carbon Electrode Types

Table 10-11. Welding current for carbon electrode (twin torch)

Table 10-12. Mechanical Property Requirements of Carbon Steel Flux-Cored Electrodes

Table 10-13. Performance and Usability Characteristics of Carbon Steel Flux Cored Electrodes

Table 10-14. Chemical Composition Requirements of Carbon Steel Flux Cored Electrodes

Table 10-15. Mechanical Property Requirement of Low Alloy Flux-Cored Electrodes

Table 10-16. Impact Requirement for Low Alloy Flux-Cored Electrodes

Table 10-17. Chemical Composition Requirements for Low Alloy Flux-Cored Electrodes

Table 10-18. Weld Metal Chemical Composition Requirements for Stainless Steel Electrodes

Table 10-19. Shielding

Table 10-20. Recommended Cable Sizes for Different Welding Currents and Cable Lengths

Table 10-21. Base Metals Weldable by the Submerged Arc Process

Table 10-22. Base Metal Thickness Range

Table 10-23. Welding Procedure Schedules for SAW

Table 10-24. Typical Analysis and Mechanical Properties of Submerged Arc Flux-Wire Combinations

Table 10-25. Electrode Type – Size and Current Range

Table 10-26. Air Carbon Arc Gouging Procedure Schedule

Table 10-27. Base Metals Weldable by the Resistance Welding Process

Table 11-1. Low Pressure of Injector Type Torch

Table 11-2. Balanced Pressure Type Torch

Table 11-3. Heating Values of Fuel Gases

Table 11-4. Oxy-Fuel Ratios Control Flame Condition

Table 11-5. Approximate Conditions for Gas Welding of Aluminum

Table 12-1. Recommended Welding Currents

Table 12-2. Mechanical Properties of Sprayed Coatings

Table 12-3. Minimum Thickness of As-Sprayed Coatings on Shafts

Table 12-4. Shrinkage of Commonly Applied Sprayed Coatings

Table 12-5. Welding Procedure Schedule for Oxyfuel Gas Cutting

Table 12-6. Template Pattern Data

Table 12-7. Common Heat Treating Problems

Table 12-8. Time Required in Case Hardening

Table 12-9. Approximate Reheating Temperatures after Carburizing of SAE Steel

Table 12-10. Magnesium Spot Weld Data

Table 12-11. Commercially Pure Titanium Spot Weld Data

Table B-1. Guide for Welding Automotive Equipment

Table B-2. Guide for Oxyacetylene Welding

Table B-3. Guide for Electric Arc Welding

Table C-1. Troubleshooting

Table D-1. Common Welding Equipment by Commercial and Government Entity Code (CAGEC)

Table D-2. Metallizing Wire

Table D-3. Welding Electrodes

Table D-4. Overlay, Welding and Cutting, Chamfering, and Heating Electrodes

Table D-5. Welding Rods

Table D-6. Brazing Alloys

Table D-7. Soldering Materials

Table D-8. Fluxes, Welding, Brazing, and Soldering

Table D-9. Carbon Blocks, Rods, and Paste

Table E-1. Temperature Ranges for Processing Metals

Table E-2. Combustion Constants of Fuel Gases

Table E-3. Melting Points of Metals and Alloys

Table E-4. Temper Colors and Temperatures

Table E-5. Heat Colors with Approximate Temperature

Table E-6. Stub Steel Wire Gauges

Table E-7. Standard Gauge Abbreviations

Table E-8. Metal Gauge Comparisons

Table E-9. Sheet Metal Gauge

Table E-10. Elements and Related Chemical Symbols

Table E-11. Decimal Equivalents of Fractions of an Inch

Table E-12. Inches and Equivalents in Millimeter (1/64 Inch to 100 Inches)

APPENDIX D

APPENDIX D

MATERIALS USED FOR BRAZING, WELDING, SOLDERING CUTTING, AND METALLIZING


D-1. GENERAL

This appendix contains listings of common welding equipment and materials used in connection with the equipment to perform welding operations. These lists are published to inform using personnel of those materials available for brazing, welding, soldering, cutting, and metallizing. These materials are used to repair, rebuild, and/or produce item requiring welding procedures.

D-2. SCOPE

The data provided in this appendix is for information and guidance. The listings contained herein include descriptions, identifying references, and specific use of common welding materials available in the Army supply system.

APPENDIX C

APPENDIX C

TROUBLESHOOTING PROCEDURES


MALFUNCTION

TEST OR INSPECTION

CORRECTIVE ACTION


OXYACETYLENE WELDING

1. DISTORTION (/fig. C-1)

Step 1. Check to see whether shrinkage of deposited metal has pulled welded parts together.

a. Properly clamp or tack weld parts to resist shrinkage.

b. Separate or preform parts sufficiently to allow for shrinkage of welds.

c. Peen the deposited metal while still hot.

Step 2. Check for uniform heating of parts during welding.

a. Support parts of structure to be welded to prevent buckling in heated sections due to weight of parts themselves.

b. Preheating is desirable in some heavy structures.

c. Removal of rolling or forming strains before welding is sometimes helpful.

Step 3. Check for proper welding sequence.

a. Study the structure and develop a definite sequence of welding.

b. Distribute welding to prevent excessive local heating.

2. WELDING STRESSES

Step 1. Check the joint design for excessive rigidity.

a. Slight movement of parts during welding will reduce welding stresses.

b. Develop a welding procedure that permits all parts to be free to move as long as possible.

Step 2. Check for proper welding procedure.

a. Make weld in as few passes as practical.

b. Use special intermittent or alternating welding sequence and backstep or skip welding procedure.

c. Properly clamp parts adjacent to the joint. Use backup fixtures to cool parts rapidly.

Step 3. If no improper conditions exist, stresses could merely be those inherent in any weld, especially in heavy parts.

Peen each deposit of weld metal. Stress relieve finished product at 1100 to 1250°F (593 to 677°C) 1 hour per 1.0 in. (25.4 cm) of thickness.

3. WARPING OF THIN PLATES (/fig. C-2)

Step 1. Check for shrinkage of deposited weld metal.

Distribute heat input more evenly over full length of seam.

Step 2. Check for excessive local heating at the joint.

Weld rapidly with a minimum heat input to prevent excessive local heating of the plates adjacent to the weld.

Step 3. Check for proper preparation of the joint.

a. Do not have excessive space between the parts to be welded. Prepare thin plate edges with flanged joints, making offset approximately equal to the thickness of the plates. No filler rod is necessary for this type of joint.

b. Fabricate a U-shaped corrugation in the plates parallel to and approximately 1/2 in. (12.7 mm) away from the seam. This will serve as an expansion joint to take up movement during and after the welding operation.

Step 4. Check for proper welding procedure.

a. Use special welding sequence and backstep or skip procedure.

b. Preheat material to relieve stress.

Step 5. Check for proper clamping of parts.

Properly clamp parts adjacent to the joint. Use backup fixtures to cool parts rapidly.

4. POOR WELD APPEARANCE (/fig. C-3)

Step 1. Check the welding technique, flame adjustment, and welding rod manipulation.

a. Ensure the use of the proper welding technique for the welding rod used.

b. Do not use excessive heat.

c. Use a uniform weave and welding speed at all times.

Step 2. Check the welding rod used, as the poor appearance may be due to the inherent characteristics of the particular rod.

Use a welding rod designed for the type of weld being made.

Step 3. Check for proper joint preparation.

Prepare all joints properly.

5. CRACKED WELDS (/fig. C-4)

Step 1. Check the joint design for excessive rigidity.

Redesign the structure or modify the welding procedure in order to eliminate rigid joints.

Step 2. Check to see if the welds are too small for the size of the parts joined.
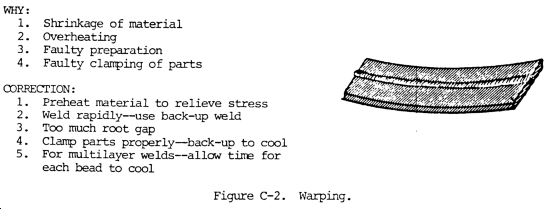
Do not use too small a weld between heavy plates. Increase the size of welds by adding more filler metal.

Step 3. Check for proper welding procedure.

a. Do not make welds in string beads. Deposit weld metal full size in short sections 8.0 to 10.0 in. (203.2 to 254.0 mm) long. (This is called block sequence.)

b. Welding sequence should be such as to leave ends free to move as long as possible.

c. Preheating parts to be welded sometimes helps to reduce high contraction stresses caused by localized high temperatures.

Step 4. Check for poor welds.

Make sure welds are sound and the fusion is good.
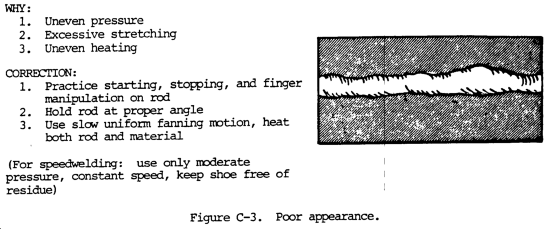
Step 5. Check for proper preparation of joints.
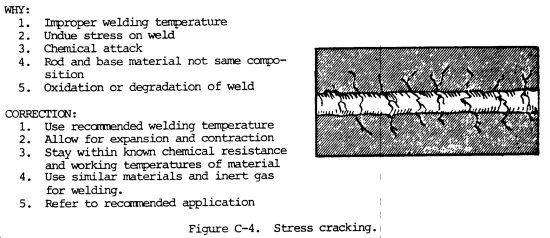
Prepare joints with a uniform and proper free space. In some cases a free space is essential. In other cases a shrink or press fit may be required.

6. UNDERCUT

Step 1. Check for excessive weaving of the bead, improper tip size, and insufficient welding rod added to molten puddle.

a. Modify welding procedure to balance weave of bead and rate of welding rod deposition, using proper tip size.

b. Do not use too small a welding rod.

Step 2. Check for proper manipulation of the welding.

a. Avoid excessive and nonuniform weaving.

b. A uniform weave with unvarying heat input will aid greatly in preventing undercut in butt welds.

Step 3. Check for proper welding technique — improper welding rod deposition with nonuniform heating.

Do not hold welding rod too near the lower edge of the vertical plate when making a horizontal fillet weld, as undercut on the vertical plate will result.

7. INCOMPLETE  PENETRATION (/fig. C-5)

Step 1. Check for proper preparation of joint.

a. Be sure to allow the proper free space at the bottom of the weld.

b. Deposit a layer of weld metal on the back side of the joint, where accessible, to ensure complete fusion at the root of the joint.

Step 2. Check the size of the welding rod used.

a. Select proper sized welding rod to obtain a balance in the heat requirements for melting welding rod, breaking down side walls, and maintaining the puddle of molten metal at the desired size.

b. Use small diameter welding rods in a narrow welding groove.

Step 3. Check to see if welding tip is too small, resulting in insufficient heat input.

Use sufficient heat input to obtain proper penetration for the plate thickness being welded.

Step 4. Check for an excessive welding speed.

Welding speed should be slow enough to allow welding heat to penetrate to the bottom of the joint.

8. POROUS WELDS (/fig. C-6)

Step 1. Check the inherent properties of the particular type of welding rod.

Use welding rod of proper chemical analysis.

Step 2. Check the welding procedure and flame adjustment.

a. Avoid overheating molten puddle of weld metal.

b. Use the proper flame adjustment and flux, if necessary, to ensure sound welds.

Step 3. Check to see if puddling time is sufficient to allow entrapped gas, oxides, and slag inclusions to escape to the surface.

a. Use the multilayer welding technique to avoid carrying too large a molten puddle of weld metal.

b. Puddling keeps the weld metal longer and often ensures sounder welds.

Step 4. Check for poor base metal.

Modify the normal welding procedure to weld poor base metals of a given type.

9. BRITTLE WELDS

Step 1. Check for unsatisfactory welding rod, producing air-hardening weld metal.

Avoid welding rods producing air-hardening weld metal where ductility is desired. High tensile strength, low alloy steel rods are air-hardened and require proper base metal preheating, postheating, or both to avoid cracking due to brittleness.

Step 2. Check for excessive heat input from oversized welding tip, causing coarse-grained and burnt metal.

Do not use excessive heat input, as this may cause coarse grain structure and oxide inclusions in weld metal deposits.

Step 3. Check for high carbon or alloy base metal which has not been taken into consideration.

Welds may absorb alloy elements from the patent metal and become hard. Do not weld a steel unless the composition and characteristics are known.

Step 4. Check for proper flame adjustment and welding procedure.

a. Adjust the flare so that the molten metal does not boil, foam, or spark.

b. A single pass weld maybe more brittle than multilayer weld, because it has not been refined by successive layers of weld metal.

10. POOR FUSION (/fig. C-7)

Step 1. Check the welding rod size.

When welding in narrow grooves, use a welding rod small enough to reach the bottom.

Step 2. Check the tip size and heat input.

Use sufficient heat to melt welding rod and to break down sidewalls of plate edges.

Step 3. Check the welding technique.

Be sure the weave is wide enough to melt the sides of the joint thoroughly.

Step 4. Check for proper preparation of the joint.

The deposited metal should completely fuse with the side walls of the plate metal to form a consolidated joint of base and weld metal.

11. CORROSION

Step 1. Check the type of welding rod used.

Select welding rods with the proper corrosion resistance properties which are not changed by the welding process.

Step 2. Check whether the weld deposit is proper for the corrosive fluid or atmosphere.

a. Use the proper flux on both parent metal and welding rod to produce welds with the desired corrosion resistance.

b. Do not expect more from the weld than from the parent metal. On stainless steels, use welding rods that are equal to or better than the base metal in corrosion resistance.

c. For best corrosion resistance, use a filler rod whose composition is the same as the base metal.

Step 3. Check the metallurgical effect of welding.

When welding 18-8 austenitic stainless steel, be sure the analysis of the steel and the welding procedure are correct, so that the welding process does not cause carbide precipitation. This condition can be corrected by annealing at 1900 to 2100°F (1038 to 1149°C).

Step 4. Check for proper cleaning of weld.

Certain materials such as aluminum require special procedures for thorough cleaning of all slag to prevent corrosion.

12. BRITTLE JOINTS

Step 1. Check base metal for air hardening characteristics.

In welding on medium carbon steel or certain alloy steels, the fusion zone may be hard as the result of rapid cooling. Preheating at 300 to 500°F (149 to 260°C) should be resorted to before welding.

Step 2. Check welding procedure.

Multilayer welds will tend to anneal hard zones. Stress relieving at 1000 to 1250°F (538 to 677°C) after welding generally reduce hard areas formed during welding.

Step 3. Check type of welding rod used.

The use of austenitic welding rods will often work on special steels, but the fusion zone will generally contain an alloy which is hard.

ARC WELDING

13. DISTORTION (/fig. C-1)

Step 1. Check for shrinkage of deposited metal.

a. Properly tack weld or clamp parts to resist shrinkage.

b. Separate or preform parts so as to allow for shrinkage of welds.

c. Peen the deposited metal while still hot.

Step 2. Check for uniform heating of parts.

a. Preheating is desirable in some heavy structures.

b. Removal of rolling or forming strains by stress relieving before welding is sometimes helpful.

Step 3. Check the welding sequence.

a. Study structure and develop a definite sequence of welding.

b. Distribute welding to prevent excessive local heating.

14. WELDING STRESSES

Step 1. Check for excessive rigidity of joints.

a. Slight movement of parts during welding will reduce welding stresses.

b. Develop a welding procedure that permits all parts to be free to move as long as possible.

Step 2. Check the welding procedure.

a. Make weld in as few passes as practical.

b. Use special intermittent or alternating welding sequence and backstep or skip procedures.

c. Properly clamp parts adjacent to the joint. Use backup fixtures to cool parts rapidly.

Step 3. If no improper conditions exist, stresses could merely be those inherent in any weld, especially in heavy parts.

a. Peen each deposit of weld metal.

b. Stress relieve finished product at 1100 to 1250°F (593 to 677°C) 1 hour per 1.0 in. (25.4 cm) of thickness.

15. WARPING OF THIN PLATES (/fig. C-2)

Step 1. Check for shrinkage of deposited weld metal.

Select electrode with high welding speed and moderate penetrating properties.

Step 2. Check for excessive local heating at the joint.

Weld rapidly to prevent excessive local heating of the plates adjacent to the weld.

Step 3. Check for proper preparation of joint.

a. Do not have excessive root opening in the joint between the parts to be welded.

b. Hammer joint edges thinner than the rest of the plates before welding. This elongates the edges and the weld shrinkage causes them to pull back to the original shape.

Step 4. Check the welding procedure.

a. Use special intermittent or alternating welding sequence and backstep or skip procedure.

b. Preheat material to achieve stress.

Step 5. Check the clamping of parts.

Properly clamp parts adjacent to the joint. Use backup fixtures to cool parts rapidly.

16. POOR WELD APPEARANCE (/fig. C-3)

Step 1. Check welding technique for proper current and electrode manipulation.

a. Ensure the use of the proper welding technique for the electrode used.

b. Do not use excessive welding current.

c. Use a uniform weave or rate of travel at all times.

Step 2. Check characteristics of type of electrode used.

Use an electrode designed for the type of weld and base metal and the position in which the weld is to be made.

Step 3. Check welding position for which electrode is designed.

Do not make fillet welds with downhand (flat position) electrodes unless the parts are positioned properly.

Step 4. Check for proper joint preparation.

Prepare all joints properly.

17. CRACKED WELDS (/fig. C-4)

Step 1. Check for excessive rigidity of joint.

Redesign the structure and modify the welding procedure in order to eliminate rigid joints.

Step 2. Check to see if the welds are too small for the size of the parts joined.

Do not use too small a weld between heavy plates. Increase the size of welds by adding more filler metal.

Step 3. Check the welding procedure.

a. Do not make welds in string beads. Deposit weld metal full size in short sections 8.0 to 10.0 in. (203.2 to 254.0 mm) long. (This is called block sequence.)

b. Welding sequence should be such as to leave ends free to move as long as possible.

c. Preheating parts to be welded sometimes helps to reduce high contraction stresses caused by localized high temperature.

d. Fill all craters at the end of the weld pass by moving the electrode back over the finished weld for a short distance equal to the length of the crater.

Step 4. Check for poor welds.

Make sure welds are sound and the fusion is good. Be sure arc length and polarity are correct.

Step 5. Check for proper preparation of joints.

Prepare joints with a uniform and proper root opening. In some cases, a root opening is essential. In other cases, a shrink or press fit may be required.

18. UNDERCUT

Step 1. Check the welding current setting.

Use a moderate welding sent and do not try to weld at too high a speed.

Step 2. Check for proper manipulation of the electrode.

a. Do not use too large an electrode. If the puddle of molten metal becomes too large, undercut may result.

b. Excessive width of weave will cause undercut and should not be used. A uniform weave, not over three times the electrode diameter, will aid greatly in preventing undercut in butt welds.

c. If an electrode is held to near the vertical plate in making a horizontal fillet weld, undercut on the vertical plate will result.

19. POOR PENETRATION (/fig. C-5)

Step 1. Check to see if the electrode is designed for the welding position being used.

a. Electrodes should be used for welding in the position for which they were designed.

b. Be sure to allow the proper root openings at the bottom of a weld.

c. Use a backup bar if possible.

d. Chip or cut out the back of the joint and deposit a bead of weld metal at this point.

Step 2. Check size of electrode used.

a. Do not expect excessive penetration from an electrode.

b. Use small diameter electrodes in a narrow welding groove.

Step 3. Check the welding current setting.

Use sufficient welding current to obtain proper penetration. Do not weld too rapidly.

Step 4. Check the welding speed.

Control the welding speed to penetrate to the bottom of the welded joint.

20. POROUS WELDS (/fig. C-6)

Step 1. Check the properties of the electrode used.

Some electrodes inherently produce sounder welds than others. Be sure that proper electrodes are used.

Step 2. Check welding procedure and current setting.

A weld made of a series of string beads may contain small pinholes. Weaving will often eliminate this trouble.

Step 3. Check puddling time to see whether it is sufficient to allow entrapped gas to escape.

Puddling keeps the weld metal molten longer and often insures sounder welds.

Step 4. Check for dirty base metal.

In some cases, the base metal may be at fault. Check this for segregations and impurities.

21. BRITTLE WELDS

Step 1. Check the type of electrode used.

Bare electrodes produce brittle welds. Shielded arc electrodes must be used if ductile welds are required.

Step 2. Check the welding current setting.

Do not use excessive welding current, as this may cause coarse-grained structure and oxidized deposits.

Step 3. Check for high carbon or alloy base metal which has not been taken into consideration.

a. A single pass weld may be more brittle than a multilayer weld because its microstructure has not been refined by successive layers of weld metal.

b. Welds may absorb alloy elements from the parent metal and become hard.

c. Do not weld a metal unless the composition and characteristics are known.

22. POOR FUSION (/fig. C-7)

Step 1. Check diameter of electrode.

When welding in narrow groove joints use an electrode small enough to properly reach the bottom of the joint.

Step 2. Check the welding current setting.

a. Use sufficient welding current to deposit the metal and penetrate into the plates.

b. Heavier plates require higher current for a given electrode than light plates.

Step 3. Check the welding technique.

Be sure the weave is wide enough to melt the sidewalls of the joint thoroughly.

Step 4. Check the preparation of the joint.

The deposited metal should fuse with the base metal and not curl away from it or merely adhere to it.

23. CORROSION

Step 1. Check the type of electrode used.

a. Bare electrodes produce welds that are less resistant to corrosion than the parent metal.

b. Shield arc electrodes produce welds that are more resistant to corrosion than the parent metal.

c. For the best corrosion resistance, use a filler rod whose composition is similar to that of the base metal.

Step 2. Check to see if the weld metal deposited is proper for the corrosive fluid or atmosphere to be encountered.

Do not expect more from the weld than you do from the parent metal. On stainless steels, use electrodes that are equal to or better than the parent metal in corrosion resistance.

Step 3. Check on the metallurgical effect of the welding.

When welding 18-8 austenitic stainless steel, be sure the analysis of the steel and welding procedure is correct, so that the welding does not cause carbide precipitations. Carbide precipitation is the rising of carbon to the surface of the weld zone. This condition can be corrected by annealing at 1900 to 2100°F (1038 to 1149°C) after welding. By doing this corrosion in the form of iron oxide, or rust, can be eliminated.

Step 4. Check for proper cleaning of the weld.

Certain materials, such as aluminum, require careful cleaning of all slag after welding to prevent corrosion in service.

24. BRITTLE JOINTS

Step 1. Check for air hardening of the base metal.

In medium carbon steel or certain alloy steals, the heat affected zone may be hard as a result of rapid cooling. Preheating at 300 to 500°F (149 to 260°C) should be resorted to before welding.

Step 2. Check the welding procedure.

a. Multilayer welds will tend to anneal hard heat affected zones.

b. Stress relieving at 1100 to 1250°F (593 to 677°C) after welding will generally reduce hard areas formed during welding.

Step 3. Check the type of electrode used.

The use of austenitic electrodes will often be successful on special steels, but the heat-affected zone will generally contain an alloy which is hard.

25. MAGNETIC BLOW

Step 1. Check for deflection of the arc from its normal path, particularly at the ends of joints and in corners.

a. Make sure the ground is properly located on the work. Placing the ground in the direction of the arc deflection is often helpful.

b. Separating the ground into two or more parts is helpful.

c. Weld toward the direction in which the arc blows.

d. Hold a short arc.

e. Changing the angle of the electrode relative to the work may help to stabilize the arc.

f. Magnetic blow is held to a minimum in alternating current welding.

26. SPATTER

Step 1. Check the properties of the electrode used.

Select the proper type of electrode.

Step 2. Check to see if the welding current is excessive for the type and diameter of electrode used.

Use a short arc but do not use excessive welding current

Step 3. Check for spalls.

a. Paint parts adjacent to welds with whitewash or other protective coating. This prevents spalls from welding to parts, and they can be easily removed.

b. Coated electrodes produce larger spalls than bare electrodes.


APPENDIX A

APPENDIX A

REFERENCES


A-1. PUBLICATION INDEXES

The following indexes should be consulted for latest changes or revisions of references given in this appendix and for new publications relating to information contained in this manual:

DA Pam 108-1 Index of Motion Pictures, Film Strips, Slides, and Phono-Recordings

DA Pam 310-1 Index of Administrative Publications

DA Pam 310-2 Index of Blank .Forms

DA Pam 310-3 Index of Training Publications

DA Pam 310-4 Index of Technical Manuals, Supply Manuals, Supply Bulletins, Lubrication Orders, and Modification Work Orders

A-2. SUPPLY MANUALS

The Department of the Army supply manuals pertaining to the materials contained in this manual are as follows:

SC 3433-95-CL-A03 Torch Outfit, Cutting and Welding

SC 3433-95-CL-A04 Tool Kit, Welding

SC 3439-IL FSC Group 34, Class 3439: Metal Working Machinery, Miscellaneous Welding, Soldering and Brazing Supplies and Accessories

SC 3470-95-CL-A07 Shop Set, Welding and Blacksmith

SC 3470-95-CL-A10 Shop Equipment, Welding

A-3. TECHNICAL MANUALS AND TECHNICAL BULLETINS

The following DA publications contain information pertinent to this manual:

TB ENG 53 Welding and Metal Cutting at NIKE Sites

TB MED 256 Toxicology of Ozone

TB TC 11 Arc Welding on Water-Borne Vessels

TB 34-91-167 Welding Terms and Definitions Glossary

TB 9-2300-247-40 Transport Wheeled Vehicles: Repair of Frames

TB 9-3439-203/1 Conversion of Welding Electrode Holder for Supplemental Air-Arc Metal cutting

TM 10-270 General Repair of Quartermaster Items of General Equipment

TM 38-750 The Army Equipment Record System and Procedure

TM 5-805-7 Welding Design, Procedures, and Inspection

TM 5-3431-209-5 Operator, Organizational, Direct Support and General Support Maintenance Manual: Welding Machine, Arc, Generator, Power Take- off Driven, 200 Amp, DC, Single Operator, Base Mounted (Valentine Model 26381)

TM 5-3431-211-15 Operator, Organizational, Direct Support, General Support, and Depot Maintenance Manual (Including Repair Parts and Special Tools Lists): Welding Set, Arc, Inert Gas Shielded Consumable Metal Electrode for 3/ 4 Inch Wire, DC 115 V (Air Reduction Model 2351-0685)

TM 5-3431-213-15 Organizational, Direct Support, General Support, and Depot Maintenance Manual with Repair Parts and Special Tools Lists: Welding Machine, Arc, General and Inert Gas Shielded, Transformer-Rectifier Type AC and DC; 300 Ampere Rating at 60% Duty Cycle (Harnischfeger Model DAR- 300HFSG)

TM 5-3431-221-15 Operator, Organizational, Direct Support and General Support Maintenance Manual: Welding Machine, Arc, Generator, Gasoline Driven, 300 Amp at 20 V Min, 375 Amp at 40 V Max, 115 V, DC, 3 KW, Skid Mounted, Winterized (Libby Model LEW-300)

TM 9-213 Painting Instructions, Field Use

TM 9-2920 Shop Mathematics

TM 9-3433-206-10 Spray Gun, Metallizing (Metaillizing Co. of America”Turbo- Jet”)

A-4. OTHER FORMS AND PUBLICATIONS

a. The following explanatory publications contain information pertinent to this material and associated equipment:

AWS A2.0-58 Welding Symbols

DA FORM 2028 Recommended Changes to publications and Blank Forms

MIL-E-17777C Electrodes Cutting and Welding Carbon- Graphite Uncoated and Copper Coated

MIL-E-18038 Electrodes, Welding, Mineral Covered, Low Hydrogen, Medium and High Tensile Steel as Welded or Stress and Relieved Weld Application and Use

MIL-E-22200/1 Electrodes, Welding, Covered

thru

MIL-E-22200/7

MIL-M-45558 Moisture Stabilizer, Welding Electrode

MIL-STD-21 Weld Joint Designs, Armored Tank Type

MIL-STD-22 Weld Joint Designs

MIL-STD-101 Color Code for Pipe Lines and Compressed Gas Cylinders

MIL-W-12332 Welding, Resistance, Spot and Projection, for Fabricating Assemblies of Low Carbon Steel

MIL-W-18326 Welding of Magnesium Alloys, Gas and Electric, Manual and Machine, Process for

MIL-W-21157 Weldments, Steel, Carbon and Low Alloy; Yield Strength 30,000-60,000 PSI

MIL-W-22248 Weldments, Aluminum and Aluminum Alloys

MIL-W-27664 Welding, Spot, Inert Gas Shielded Arc

MIL-W-41 Welding of Armor, Metal- Arc, Manual, with Austentic Electrodes for Aircraft

MIL-W-6858 Welding, Resistance, Aluminum, Magnesium, NonHardening Steels or Alloys, and Titanium Alloys, Spot and Seam

MIL-W-6873 Welding, Flash, Carbon and Alloy Steel

MIL-W-8604 Welding of Aluminum Alloys, Process for

MIL-W-8611 Welding, Metal-Arc and Gas, Steels and Corrosion and Heat Resisting Alloys, Process for

MIL-W-45205 Welding, Inert Gas, Metal- Arc, Aluminum Alloys Readily Weldable for Structures, Excluding Armor

MIL-W-45206 Welding, Aluminum Alloy Armor

MIL-W-45210 Welding, Resistance, Spot, Weldable Aluminum Alloys

MIL-W-45223 Welding, Spot, Hardenable Steel

b. The following health and safety standards are pertinent to this material and associated equipment:

ANSI (American National Standards Institute) Z49.1-1973, Safety in Welding and Cutting

ANSI Z87.1-1968, American National Standard Practice for Occupational and Educational Eye and Face Protection

ANSI 788.12, Practices for Respiratory Protection

AWS (American Welding Society), Bare Mild Steel Electrodes and Fluxes for Submerged Arc Welding

AWS, Carbon Steel Electrodes for Flux Cored Arc Welding

AWS, Flux Cored Corrosion Resisting Chromium and Chromium- Nickel Steel Electrodes

41 Code of Federal Regulations 50-204.7

29 Code of Federal Regulations 1910

National Bureau of Standards, Washington DC, National Safety Code for the Protection of Hands and Eyes of Industrial Workers

NFPA (National Fire Protection Association) 51-1969, Welding and Cutting Oxygen Fuel Gas systems

NFPA 51B-1962, Standard for Fire Prevention in Use of Cutting and Welding Processes

NFPA 566-1965, Standard for Bulk Oxygen Systems at Consumer Sites

Public Law 91-596, Occupational Safety and Health Act of 1970; especially Subpart I, Personal Protective Equipment, paragraph 1910.132; and Subpart Q, Welding, Cutting, and Brazing, paragraph 1910.252

c. The following commercial publications are available in technical libraries:

Welding Data Book Welding Design & Fabrication (Industrial Publishing Co.) Cleveland, OH 44115

The Welding Encyclopedia Welding Engineers Publications Inc. Morton Grove, IL 60053

d. The following commercial and military publications are provided as a bibliography;

Modern Welding Technology, Prentice-Hall, 1979, Englewood Cliffs, NJ

ST 9-187, Properties and Identification of Metal and Heat Treatment of Steel, 1972

Symbols for Welding and Nondestructive Testing Including Brazing, American Welding Society, 9179, Miami, FL

TM 5-805-7, Welding Design, Procedures and Inspection, 1976

TM 9-237, Welding Theory and Application, 1976

Welding Encyclopedia, Monticello Books, 1976, Lake Zurich, IL

Welding Handbook, Seventh Edition, Volume 1: Fundmentals of Welding, 1981, American Welding Society, Miami, FL

Welding Handbook, Seventh Edition, Volume 2: Welding Processes – Arc and Gas Welding, Cutting, and Brazing, 1981, American Welding Society, Miami, FL

Welding Handbook, Seventh Edition, Volume 3: Welding Processes – Resistance and Solid- State Welding and Other Joining Processes, 1981, American Welding Society, Miami, FL

Welding Handbook, Seventh Edition, Volume 4: Metals and their Weldability, 1981, American Welding Society, Miami, FL

Welding Handbook, Sixth Edition, Volume 5: Applications of Welding, 1973, American Welding Society, Miami, FL

Welding Inspection, 1980, American Welding Society, Miami, FL

Welding Terms and Definitions, 1976, American Welding Society, Miami, FL